Fall is a season of transformation. Leaves shift from green to fiery reds, golden yellows, and deep oranges, casting a warm glow across the landscape.
For beginner photographers, it’s the perfect time to grab your camera and immerse yourself in nature’s most vivid display.
This post is here to help you understand how to make the most of the season with practical tips, creative inspiration, and easy-to-follow techniques.
I receive a small commission from links in this post, thank you for your support
A Guide to Fall Landscape Photography: Capturing the Essence of Autumn
As the wheel of the year turns towards autumn, the landscape undergoes a transformation that is nothing short of magical. For a landscape photographer, fall is a time when nature’s palette is at its most vibrant, offering an array of colors that beckon to be captured.
The air has that crisp, earthy smell of fallen leaves, and light filtered through the trees in a way that felt almost unreal. Moments like that define why we should roam the wilderness each fall.
Capturing the essence of autumn goes beyond pointing your camera at a forest and clicking the shutter. It requires a keen understanding of the technical aspects, an appreciation for color theory, and an awareness of the changing seasons.
In this post, I’ll walk you through essential techniques and considerations for fall landscape photography, ensuring your images not only capture the beauty of the season but also resonate with the deeper connections to nature that this time of year represents.
My Free Fall Photography Fundamentals guide walks you through everything you need to capture not just images, but the true spirit of the season.
Ready for Your Best Fall Photos Yet?
Embracing the Magic of Autumn
To create compelling fall landscape photographs, we have to blend technical proficiency with an understanding of color theory and composition, while also embracing the symbolic transition of the seasons. Patience is everything. Often the best fall shots come when you’re willing to wait and watch the light and how it interacts with the landscape.
Quick Gear List for Fall Photography
- Sturdy Tripod from FLM
- Zoom (Canon 24-105mm)
- Long Range Zoom (100-500mm)
- Wide Angle (Rokinon 14mm)
- Remote Trigger (or use in Camera timer)
- Lens Cloths
- ND Filters
- Polarizer
The Four Elements in Fall Photography
The four elements (earth, air, fire, and water) are deeply interconnected with the changing of the seasons. Each element can be found in the landscape and can guide your approach to capturing the fall beauty.
Earth: The earthy tones of browns and greens dominate the forest floor, symbolizing stability and grounding. Focus on capturing these hues in the textures of fallen leaves, moss-covered rocks, and the ruggedness of tree bark.
Air: The crispness of autumn air brings clarity and sharpness to the atmosphere. Capture this element in the way light filters through the trees or in the movement of leaves fluttering in the wind.
Fire: The vibrant reds, oranges, and yellows of fall foliage represent the fire element, embodying transformation and renewal. These colors can dominate your compositions, creating a sense of warmth and energy.
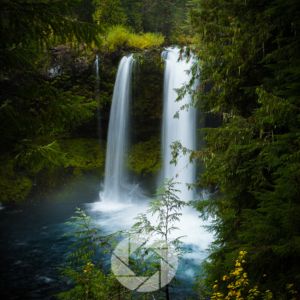
Water: Reflective lakes and rivers in autumn capture the stillness and fluidity of water, offering opportunities to play with reflections that double the vibrancy of the season’s colors.
Why Do Leaves Change Color?
The science behind fall colors and understanding why leaves change color helps you anticipate the best conditions for photos.
As temperatures drop and daylight shortens, chlorophyll breaks down, revealing other pigments like carotenoids (yellows) and anthocyanins (reds and purples). Knowing this helps you predict when certain trees might peak.

Discover Your Next Journey – These Tours are designed for people who connect with light and landscape.
Understanding Color Theory for Autumn Photography
Fall is synonymous with a rich, warm color palette that can be enhanced by understanding and applying color theory in your compositions. I actually went to a craft store and bought a color wheel which I use in the field and when processing images to make the most out of every image in every season.
Colors opposite each other on the color wheel, like orange and blue, are what is called complimentary colors: they create striking contrasts that can make your images pop.


This technique is particularly effective during the golden hour when the warm tones of the leaves contrast beautifully with the cool blue sky.
Analogous colors are colors next to each other on the color wheel, such as red, orange, and yellow. Using analogous colors in your compositions can create harmony and a sense of cohesion, perfect for capturing the serene beauty of a forest in full autumnal bloom.
A triadic color scheme involves three colors evenly spaced around the color wheel, like red, yellow, and blue. This approach can bring dynamic energy to your images, particularly when capturing more vibrant scenes like a sunset over a fiery autumn landscape.
Understanding how to utilize these color combinations allows you to create images that are not only visually striking but also emotionally resonant, reflecting the deeper themes of the season.
For example, golden tones invite the viewer into the scene, so including golden hues/light strategically in your image can hold and/or lead a viewers eye through the scene.
Mastering Composition in Autumn Landscapes
One of the most exciting things about fall photography isn’t just the color, it’s how you compose those colors into something magical.
You might stumble on a glowing grove of trees, a leaf-strewn trail, or a foggy mountain scene, but without strong composition, even the most beautiful landscape can fall flat.
This is where composition becomes your secret weapon. It’s what turns a snapshot into a photograph that feels like autumn. Whether you’re standing in the middle of a vibrant forest or kneeling by a puddle reflecting golden leaves, understanding how to guide the viewer’s eye makes all the difference.
Let’s explore simple yet powerful ways to compose your autumn photos such as using natural lines to working with color contrast. And don’t worry; these tips are beginner-friendly and field-tested. They’re easy to practice, even on your next local walk through the woods.
Let’s break down the tools you can use to compose autumn images that draw people in, hold their attention, and make them feel like they’re standing right there in the scene with you.
12 Best Fall Compositions to Draw People In
Leading Lines
Leading lines are visual paths that draw the viewer’s eye into and through a photograph. These lines can be straight or curved, obvious or subtle. Try placing the line starting in a corner and leading diagonally to the main subject; it adds depth and visual motion.
They help organize a composition and guide the viewer’s gaze, usually toward the focal point. Humans instinctively follow lines, so they’re powerful storytelling tools.
Look for:
- Trails, boardwalks, rivers, fences
- Shorelines, rows of trees, or even clouds


Foreground Interest
This involves placing a subject (like rocks, flowers, or logs) in the foreground to add a third dimension to your image (background, midground, foreground)
Having foreground interest creates a sense of scale and draws the viewer into the scene. It transforms a flat landscape into one with layers. Use a wide-angle lens, crouch low, and keep your foreground element close to the lens to emphasize its presence.
Look for:
- Textures and colors that contrast with the background
- Leading lines within the foreground elements (like cracks in rocks, leaf patterns)


Symmetry and Reflections
Symmetry creates balance by making each side of the image a mirror or near-mirror of the other. Reflections are one of the easiest ways to find symmetry in nature.
Symmetry is visually satisfying and feels harmonious. Reflections double your visual impact and help slow the viewer down. Symmetry works best when the camera is exactly level. Use a tripod and spirit level if needed.
Look for:
- Still water: lakes, puddles, tide pools
- Manmade symmetry: bridges, roads, buildings
Framing
Using elements within the scene (branches, windows, doorways) to frame your subject. Frames help isolate your subject, add depth, and provide context. They also pull the eye inward toward your focal point. The frame shouldn’t distract; blur it slightly using a shallow depth of field.
Look for:
- Overhanging branches, red, yellow leaves
- Arches, tunnels, or rock openings
- Even fog or light beams can act as a subtle “frame”

Negative Space
Empty space around the subject such as sky, fog, snow, sand, water, that isn’t “doing much,” but helps the subject breathe. Don’t center your subject, instead try placing it to one side and let the negative space balance the composition.
It emphasizes your subject and gives your photo a calm, uncluttered feeling. It draws attention to the subject through contrast.
Look for:
- Isolated trees, rocks, or people
- Foggy mornings, deserts, snowfields

Rule of Thirds & Golden Ratio
These are compositional grids that help position your subject. The Rule of Thirds divides your frame into a 3×3 grid; the Golden Ratio creates a spiral or rectangle based on the Fibonacci sequence. Most cameras and phones allow you to overlay a grid; turn it on to help compose your shots.
Off-center placement often feels more dynamic and pleasing to the eye. These rules guide the viewer naturally through the image.
Look for:
- Placing the horizon on the top or bottom third
- Aligning mountains, trees, or people at grid intersections
Diagonal Lines
Slanted lines in a composition that move the eye through the frame diagonally. Diagonal lines that cross or intersect can create dynamic balance or tension; play with those relationships.
They add energy, tension, and movement, helping the viewer explore the photo in a more active way.
Look for:
- Sloped hills, tree branches, fences, fallen logs
- Roads curving into the distance
Pro tip:
Scale and Perspective

Including a recognizable object (person, animal, tent, etc.) to show how big or small your landscape really is.
It adds relatability. Viewers can place themselves in the scene and feel its grandeur or intimacy. Use a telephoto lens to compress distance or a wide-angle lens to exaggerate foreground scale as both can enhance perspective.
Look for:
- A cabin in a valley or a figure on a dock;
- People in the distance on a ridge
Color and Contrast and Fall Photography
Using complementary or contrasting colors (think orange vs. blue) and tones (light vs. dark) to draw attention and create visual punch.
The eye is naturally drawn to contrast, whether in color, brightness, or texture. Shoot during golden hour or blue hour when contrast and color naturally pop without harsh shadows.
Look for:
- Autumn leaves against a blue sky
- Dark tree trunks against mist
- Snow against deep shadows
Balance
Distributing “visual weight” evenly in your photo. It’s not about symmetry, but about equilibrium.
It makes the image feel grounded and whole. Without balance, one side may feel too empty or too busy. Step back and ask yourself: “Does my eye want to stay in the photo, or does it want to escape?”
Look for:
- A dominant subject on one side, and a smaller, less noticeable element on the other
- Light and dark balancing each other out
Patterns and Textures
Repeating elements like bark, leaves, water ripples, used as the main subject or supporting texture. Shoot when light is soft (overcast days or golden hour) to avoid harsh shadows and get subtle detail.
Patterns create rhythm and harmony. Textures add sensory detail, almost letting the viewer “feel” the image.
Look for:
- Fallen leaves arranged naturally
- Cracks in desert clay or waves in sand dunes
Breaking the Rules
Once you understand the rules, breaking them intentionally can create bold, artistic images.
Photography is an expressive art. Rules are guidelines, not fences. Breaking them with intent can tell more powerful stories.
Try:
- Centering your subject
- Tilting the horizon
- Shooting into direct light or using motion blur
Essential Gear for Fall Photography
While smartphones are better than ever, a DSLR or mirrorless camera gives you more control over settings and quality. Look for models with good dynamic range and weather-sealed bodies if you’ll be outdoors often.
Gear Choices for Fall Photography
Lenses for Fall Photography
Lens choices vary depending on the scene and your goals. A wide-angle lens is great for capturing sweeping forest scenes.
A wide-angle lens is great for capturing expansive landscapes filled with color, while a telephoto lens can help isolate specific details like a lone tree or a patch of leaves, creating more intimate fall photography compositions (yellow larch tree captured below at 600mm.

A macro lens lets you get close to detailed leaf patterns, other foliage, and helps you to express yourself and capture the smallest fall details. Above is foliage in a pond at Butchart Gardens, shot at 105mm.
A standard zoom (24–105mm) offers flexibility for both landscapes and portraits. I also use a 100-500mm telephoto lens so that most images are within reach.
Tripods and Filters
Tripods and filters are essential kit when creating fall images. Use a tripod for long exposures, especially in low light or when photographing waterfalls. It also allows for more precise framing and composition.
A circular polarizer helps reduce glare and enrich the sky and foliage tones.
Filters aren’t a necessity but they will improve your outcomes.
Neutral density filters are handy for achieving motion blur in streams and waterfalls. You can also use a Clear Night by Haida or Pure Night Filter (made for astrophotography), as they enhance reds, perfect for fall.
Selecting the right gear is essential for capturing the full spectrum of fall’s beauty.
Camera Settings for Capturing Fall Foliage
Use a narrow aperture (f/8 to f/11) for sharp landscapes. For portraits or artistic blur, open up to f/2.8 or f/4.
Use a fast shutter of at least 125 to freeze falling leaves.
Slow it down for silky waterfalls or dreamy motion blur, usually half a second or greater exposure time.
It is important to consider ISO and also check your histogram. Keep ISO low (100-400) in daylight to reduce noise. Bump it up only when needed in lower light.
Knowing if your camera is ISO invariant and the different levels of noise at difference ISO settings is important: you can then know how low you can set your ISO in low light conditions without increasing noise when you are post-processing.
Check out the ISO invariance charts on Photons to Photos. They’re a great resource to understand your camera’s performance at various ISO levels.
White Balance should be set strategically, depending on the desired outcome. Set it to “cloudy” or “shade” to warm up your images naturally.
Use single-point autofocus for precision and switch to manual focus for final artistic control over your focal point to ensure it is in focus. Check each image after you capture it to verify you’ve captured focus correctly.
Focus stacking is a great tool to use to ensure proper focus throughout the scene. Just be mindful of wind and leaves moving in the wind, you would need to capture one still frame of just the foliage in focus to ensure your focus stack has the leaves in focus.
📸Learn for free!
➡️ FREE Wallpapers and Guides
➡️ DISCOUNTS on future Tours & Tutorials
➡️ TIPS for improving Your photography

You can unsubscribe at anytime.
Technical Tips for Capturing Fall Landscapes
Achieving stunning fall photographs requires more than just an eye for color; it also demands technical precision. Here are some fall photography techniques that I swear by, that will help you out creatively.
Lighting
Autumn light can be soft and diffused, especially in the early morning or late afternoon. Side lighting enhances textures and adds depth to your images, while backlighting can make leaves glow, creating a magical, ethereal quality.
Polarizers
To reduce glare and enhance the saturation of colors, a circular polarizing filter is indispensable. It’s particularly useful when photographing wet leaves or capturing reflections on a lake, ensuring the colors are as rich and vibrant as possible.
Some astrophotography filters like Clear Night by Hoya and Pure Night enhance reds in your image, so if you have one of these filers, experiment with it to see what it can do for your fall imagery.
Composition
Composition fundamentals like the rule of thirds and leading lines are always important, but in fall photography, pay special attention to framing. Use tree trunks, paths, or rivers to lead the viewer’s eye through the image, making the most of the natural patterns and shapes that the season offers.
Long Exposures
When capturing moving water in the autumn landscape, long exposures can soften the scene and provide a contrast to the sharpness of the foliage. This technique can add a dreamy, almost surreal quality to your images.
Creative Fall Photography Ideas
Autumn portraits are very popular. Place subjects against vibrant backdrops. Have them interact with the environment, like tossing leaves or walking through a forest trail.
Leaf details and other macro scenes are plenty in fall. Zoom in on veins, water droplets, or unique shapes. These can be just as powerful as big landscapes.
Seasonal activities are great for creating mood and storytelling. Capture moments like apple picking, hayrides, or cozy campfires to tell the story of the season.
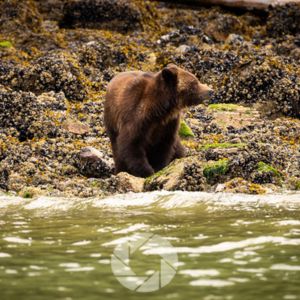
Wildlife encounters can work well to draw audiences into your scene. Squirrels, deer, and birds are active during fall. Use a zoom lens and patience.
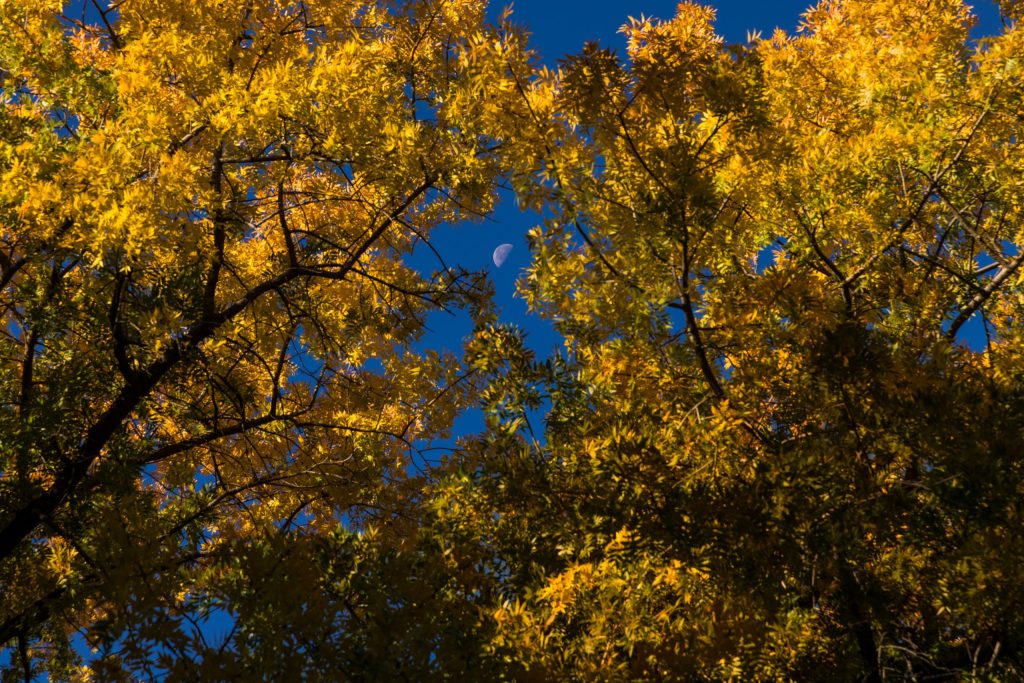
Try photographing the moon through bare trees or a campsite under a starry sky. Fall nights are crisp and clear.
Post-Processing Tips for Autumn Images
Boost Vibrance slightly to make colors pop without looking unnatural. Use HSL tools to selectively adjust certain tones such as reds and oranges.
Slightly increasing the blue saturation slider right at the beginning of your editing will enhance the total color Vibrance in your image.
Increasing contrast adds depth. I achieve this with a S curve in the adjustments panel in Lightroom.
Depending on the image I will strategically apply texture where it make contextual sense for the mood, lighting, and message I am trying to get across with the image.
Fix crooked horizons and remove distractions by cropping. A tighter crop can sometimes improve composition. Make sure to leave yourself some space around the edges when capturing your images so that there is room to crop, if required.
Apply light sharpening to bring out details, especially if you’re sharing online or printing your work.
Dive deeper into fall photography post processing with this blog post.
Conclusion: Embrace Fall Photography
Fall is a fleeting but unforgettable season. Whether you’re wandering through golden forests or photographing a single red maple leaf, autumn is a gift for photographers of all skill levels.
With a little planning, the right settings, and some creative inspiration, you can capture the essence of the season in every frame.
📸Learn for free!
➡️ FREE Wallpapers and Guides
➡️ DISCOUNTS on future Tours & Tutorials
➡️ TIPS for improving Your photography
You can unsubscribe at anytime.
- A Guide to Fall Landscape Photography: Capturing the Essence of Autumn
- Embracing the Magic of Autumn
- Quick Gear List for Fall Photography
- The Four Elements in Fall Photography
- Why Do Leaves Change Color?
- Understanding Color Theory for Autumn Photography
- Mastering Composition in Autumn Landscapes
- 12 Best Fall Compositions to Draw People In
- Essential Gear for Fall Photography
- Gear Choices for Fall Photography
- Camera Settings for Capturing Fall Foliage
- Technical Tips for Capturing Fall Landscapes
- Creative Fall Photography Ideas
- Post-Processing Tips for Autumn Images
- Conclusion: Embrace Fall Photography
- 📸Learn for free!
- 📸Learn for free!