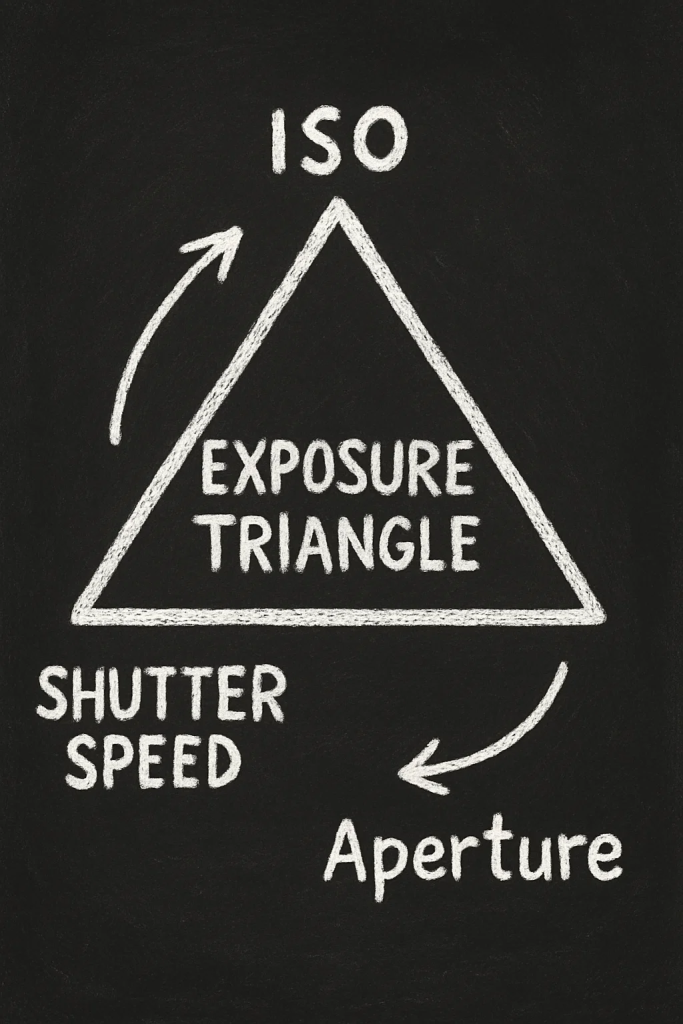
The exposure triangle is the foundation of mastering light in photography.
At its core, it’s the relationship between shutter speed, aperture, and ISO. Learn this, and you unlock creative control over every shot; whether you’re chasing golden-hour peaks or moody misty mornings.
In this post, we’ll explore exposure triangle photography, reveal the exposure triangle formula, and show how to use the exposure triangle to achieve perfect exposure in your landscapes.
Exposure Triangle For Beginners
What Is the Exposure Triangle?
The exposure triangle is a model that illustrates how aperture, shutter speed, and ISO must balance to control exposure and affect image qualities like depth of field, motion blur, and noise. Light enters the camera through the aperture, remains for the shutter speed duration, and the sensor’s ISO determines brightness amplification.

Discover Your Next Journey – These Tours are designed for people who connect with light and landscape.
Why Exposure Triangle Photography Is Critical
Understanding how to set the exposure triangle gives you confidence in any light. Unlike autopilot modes, this knowledge lets you control creative intent; whether you want crisp details, silky water flows, or sharp starfield shots.
The exposure triangle isn’t just a technical skill, it’s the foundation of creative control in photography. When you know how aperture, shutter speed, and ISO interact, you stop relying on luck or “auto” settings and start making deliberate choices that shape the mood, story, and precision of every landscape photo you take.
Exposure Triangle for Landscape Photography
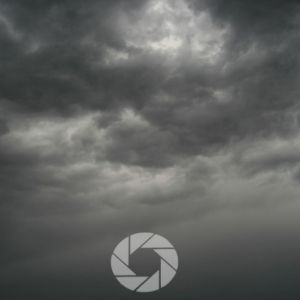
In landscape photography, light is always changing. Golden hour glows, cloudy days flatten tones, and moonlit scenes challenge your sensor’s sensitivity. With a firm grasp of the exposure triangle, you’re prepared to adapt confidently.
You’ll know how to compensate for a darker scene by widening your aperture or lengthening your shutter without introducing too much noise with ISO.
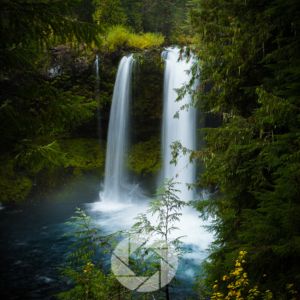
You’ll understand why shooting silky waterfalls demands a slower shutter speed; and how to balance that with a narrow aperture to maintain sharp focus from front to back.
More importantly, this understanding allows you to execute your creative intent. Want a crisp, tack-sharp image of a mountain range at sunrise? You’ll know how to freeze motion and maintain depth of field.
Want to smooth out ocean waves or capture the Milky Way? You’ll know how to bracket exposures, extend shutter times, and adjust ISO intelligently for the cleanest results.
Autopilot modes will never offer this level of control. They can guess but they can’t interpret your vision.
Knowing how to set the exposure triangle manually means you’re no longer at the mercy of your camera’s defaults. You become the decision-maker. That’s how good photographers grow into great ones.
What Are the Three Parts of the Exposure Triangle?
- Aperture: Fields of depth of focus
- Shutter Speed: Captures motion or freeze
- ISO: Brightness level
Think of a triangle—change one side, and you must adjust the others to maintain equilibrium.
Three Parts of the Exposure Triangle Explained
Aperture (f-stop): Controls how much light enters. Low f-numbers (ƒ/2.8) mean shallower focus and more light; high (ƒ/16) create deep scenes but darker images.
Shutter Speed: Dictates how long light hits the sensor. Fast speeds (1/500 s) freeze action; slow ones (½ s) blur motion which is ideal for smooth waterfalls.
ISO: Sets sensor sensitivity. Low ISO (100) = clean shots; high ISO (3200) = brighter shots with more noise.
These three parts work together in what’s known as the exposure triangle formula, where a change in one setting needs compensation in another
How to Set the Exposure Triangle: Step-by-Step
Choosing your aperture is an artistic decision. What depth of field do you want? A sharp mountain range? Go ƒ/8–ƒ/11. A soft background? Try ƒ/2.8–ƒ/5.6. (Read in-depth about aperture at this post)
What sort of energy do you want in the scene. Want smooth silky water? Use slow speeds like ½ s or more. Need sharp details? Go faster to avoid hand-shake blur. Using a faster shutter speed will freeze motion in wind swept meadows, waterfalls, and trees.
How much light do you need to set the mood? Aim for the camera’s base ISO (usually 100). Only raise it when you can’t reach proper exposure with aperture and shutter speed alone. Newer cameras do a good job with noise when raising the ISO values much higher than in past models.
Additionally, ISO invariance means that you can capture an image at a low and a high ISO and create the same amount of noise. This means you can collect more image data and more leeway in post processing. Please read this in-depth post ISO Invariance Explained.
As a final check, review your meter or histogram by checking the image after you take it. If underexposed, open aperture, lengthen shutter speed, or raise ISO. If overexposed, do the reverse.
How to Use the Exposure Triangle in Landscape Photography
The exposure triangle (aperture, shutter speed, and ISO) is the backbone of controlling light and mood in your images. But in landscape photography, these elements take on specific roles because you’re often balancing three key priorities: maximum depth of field, minimal noise, and controlled motion.
Here’s how I approach each setting in the field.
Aperture: f/8 to f/16 for Tack-Sharp Images
In most landscape situations, you want your entire frame in focus from foreground wildflowers to distant mountain peaks. To achieve this, I typically shoot between ƒ/8 and ƒ/16 (usually ƒ/11), which is the sweet spot for sharpness on most lenses.
Wider apertures like ƒ/2.8 are great for isolating subjects, but if your goal is often to tell a complete story with detail from edge to edge, you’ll need to go at least ƒ/8 . Just be cautious not to go beyond ƒ/16 unless necessary, as diffraction can start to soften the image.
Shutter Speed: Use Long Exposures to Capture Movement and Mood
Shutter speed is where the magic happens. Want to smooth out a lake, blur a waterfall into silky ribbons, or streak clouds across the sky? I use shutter speeds ranging from 1 to 30 seconds, depending on the effect I want.
In bright daylight, this means attaching a neutral density (ND) filters to reduce the light hitting the sensor, allowing for those longer exposures without overexposing the frame. I often carry a 6-stop and a 10-stop ND filter for flexibility.
ISO: Keep It Low to Preserve Detail
High ISO settings introduce noise, especially in shadow areas, which can ruin the texture and clarity of your image. That’s why I stick to ISO 100 or 200 for 95% of my landscape shots.
If the scene is especially dark (like blue hour or moonlight), I’ll open up the aperture slightly or lengthen the shutter instead of raising ISO. I only push it higher when I have no other choice like hand-holding in fading light.
The Balancing Act
Once you set your desired aperture for depth and choose a shutter speed to express movement, you can adjust ISO last to balance the exposure.
As lighting conditions shift (like during golden hour), revisit your settings. You may need to open up the aperture a stop or two, or slightly boost ISO to maintain proper exposure.
The key is knowing which element you’re willing to compromise and which is non-negotiable for your vision.
And one final tip? Dial in your exposure, then fine-tune your composition. There’s no point in framing a perfect shot if your exposure is off, and vice versa. It’s a dance between art and technique, and once you understand how to use the exposure triangle fluidly, it becomes second nature.
How Do You Do a Perfect Exposure Triangle?
While understanding the triad of ISO, aperture, and exposure is important, much like the rules of composition, there is no perfect combination. The “perfect exposure triangle” means capturing the image with correct brightness and your desired artistic look. And this is different for every photographer, in every genre.
Start off with your camera in manual mode, giving you full control over the exposure triad; experiment until the histogram centers around mid-tones.
Your histogram should be consulted after your shots to ensure shadows and highlights are not clipped and that the exposure value is gathering as much light/data as possible. Only look at the histogram after you’ve taken a shot: the electronic viewfinders may not give correct histogram readings in darker conditions due to the screen.
As with any skill you are trying to master, practice consistently by making changes to the exposure triad until settings become intuitive
Conclusion
Understanding and mastering the exposure triangle empowers your landscape photography. It gives you freedom to create the images you picture in your mind, rather than leaving things to chance.
By learning how to set the exposure triangle, following the exposure triangle formula, and practicing regularly, you’ll hit perfect exposure with creative intent every time.
📸Learn for free!
➡️ FREE Wallpapers and Guides
➡️ DISCOUNTS on future Tours & Tutorials
➡️ TIPS for improving Your photography

You can unsubscribe at anytime.
- Exposure Triangle For Beginners
- What Is the Exposure Triangle?
- Why Exposure Triangle Photography Is Critical
- Exposure Triangle for Landscape Photography
- What Are the Three Parts of the Exposure Triangle?
- Three Parts of the Exposure Triangle Explained
- How to Set the Exposure Triangle: Step-by-Step
- How to Use the Exposure Triangle in Landscape Photography
- How Do You Do a Perfect Exposure Triangle?
- Conclusion
- 📸Learn for free!
References
Peterson, Bryan. Understanding Exposure: How to Shoot Great Photographs with Any Camera. Amphoto Books, 2016.
Northrup, Tony. “Photography Basics: The Exposure Triangle.” Tony Northrup, YouTube, 2 June 2016, www.youtube.com/watch?v=F8T94sdiNjc.
Jarvis, Chris. “The Exposure Triangle – A Beginner’s Guide.” Photography Life, 7 Jan. 2022, https://photographylife.com/what-is-exposure-triangle
Digital Photography School. “Understanding the Exposure Triangle: Aperture, ISO & Shutter Speed.” Digital Photography School, www.digital-photography-school.com/learning-exposure-in-digital-photography/.