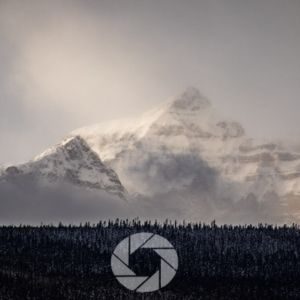
Mountain Photography tips are simple in idea and tricky in practice: chase the light, show scale, and respect the mountain.
In this guide I give you 15 field-tested tips each with camera settings and a short shot-list so you can get out, shoot with confidence, and come home with images that actually feel like the place you stood in.
I receive commissions from links in this post, thank you for your support
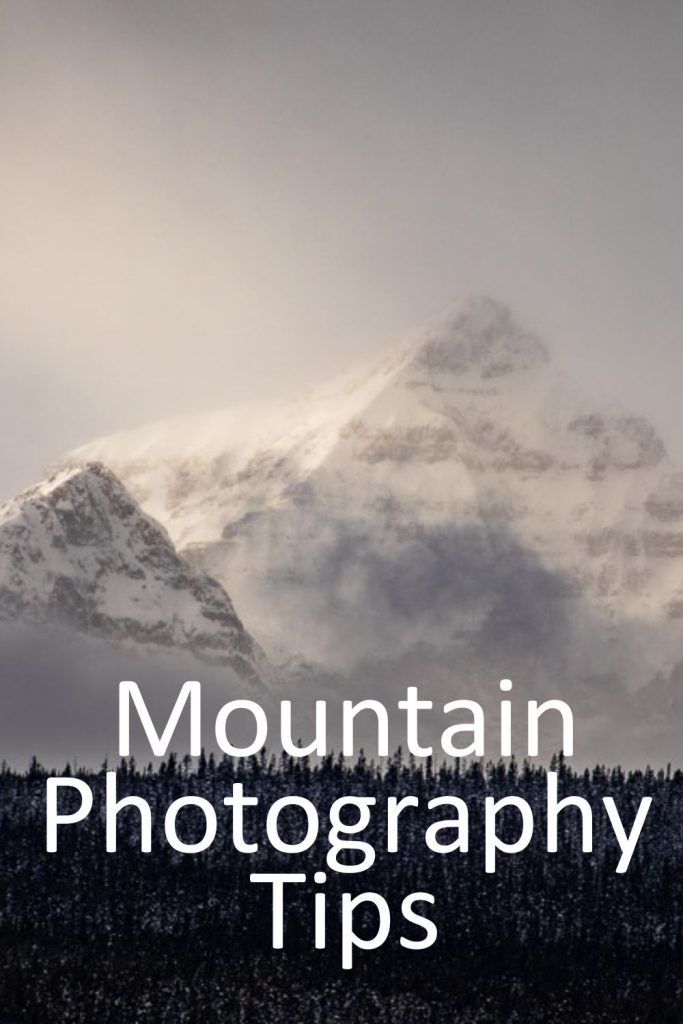
Mountain Photography Tips
Over the years I’ve found that the photographers who consistently bring home memorable mountain images aren’t just following recipes; they understand why a choice was made, they test it, and they can adapt it when the mountain changes its mind.
Mountain photography tips aren’t just about camera settings or technical know-how; they’re about cultivating a deeper connection with wild landscapes and learning how to translate that feeling into images.
By slowing down, preparing thoughtfully, and experimenting in the field, you’ll find that your photographs do more than document mountains; they tell stories of resilience, scale, and beauty.
What matters most is that you bring your own perspective. The mountains have been standing for millions of years, but the way you experience them, the way you see light falling across a jagged ridge or notice the delicate detail of alpine flowers against a vast backdrop, is entirely unique.
Below are 15 practical tips each framed with an extended “why it matters,” plus the exact settings and shot ideas to put them to work.
Fast Reference Chart – Quick Settings by Mountain Scenario
| Scenario | Lens | Aperture | ISO | Shutter | Extras |
|---|---|---|---|---|---|
| Grand vista | 16–35mm | f/8–f/16 | 50–100 | variable (use histogram) | Panoramas, bracket |
| Alpenglow layers | 70–200mm / 200–400mm | f/8 | 100–200 | 1/125–1/500 | Tele for compression |
| Silky lake/stream | 24–70mm | f/8–f/11 | 50–100 | 1–30s (ND) | 6–10 stop ND |
| Fog/mood shots | 24–70mm | f/4–f/8 | 200–800 | 1/60–1/250 | CPL off, dehaze careful |
| Summit portrait | 35–85mm | f/4–f/5.6 | 100–400 | 1/250–1/1000 | Reflector/flash optional |
| Tele layer compression | 200–400mm | f/8–f/11 | 100–400 | 1/250–1/1000 | Watch haze, use tripod if possible |
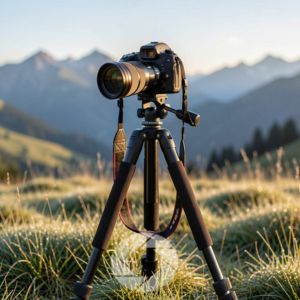
Mountain Photography Gear
- Sturdy Tripod from FLM
- Zoom (Canon 24-105mm)
- Long Range Zoom (100-500mm)
- Wide Angle (Rokinon 14mm)
- Remote Trigger (or use in Camera timer)
- Lens Cloths
- ND Filters
- Polarizer
15 Mountain Photography Tips
Use these 15 field-tested techniques, camera settings, and shot lists as your portable workshop: plan smart, shoot with intention, and edit with restraint. The mountains reward patience and when you return with images that feel like the place, you’ll know the effort was worth it.
- Hunt for Light
- Use Strong Foreground
- Scout, Plan, Pivot if Necessary
- Bracket Exposures
- Use Lens focal length to Express Yourself
- Use Polarizers and ND Filters
- Add in the Human Element
- Embrace Bad Weather
- Master Composition Rules – then Break Them
- Watch Edge and Peak Lines
- Experiment with Black and White
- Expose for the Highlights
- Safety First
- Post Process to Preserve Details
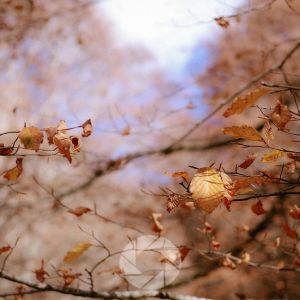
- Take Advantage of Seasonal Shifts
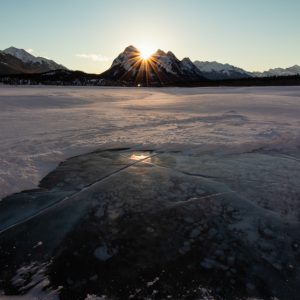
Hunt for the Light; Golden hour, Blue hour, Alpenglow and Crepuscular drama
Light sculpts mountains. At high sun the scene flattens; at low sun the ridges gain texture, shadows deepen, and colors warm.
Alpenglow and crepuscular shafts are short-lived but transformational; they add emotion and reveal form. Learning to read and prioritize light lets you spend your time where the mountain rewards you with dimensionality and mood.
Mountains interact with light in ways that flatter them most at the edges of the day. Golden hour warms peaks, while blue hour enhances drama with cool tones and subtle contrasts. Shooting at midday often results in harsh, flat images and this can be the perfect time to harness that contrast by going black and white.
Practical Advice: Arrive early and stay late. Peaks catch light before valleys, so plan to be in position well before sunrise. Use apps like PhotoPills or The Photographer’s Ephemeris to track when light will hit specific faces of a mountain. As for sunset, be earlier as well: light tends to be fleeting and disappear quickly in the mountains and valleys.
Field-tested camera settings
- Lens: 16–35mm for grand vistas; 70–200mm to isolate glow on ridgelines
- Aperture: f/8–f/11 for landscape sharpness; f/4–f/5.6 if you need faster shutter for handholding
- ISO: 64–200 (use base ISO for clean files)
- Shutter: varies i.e. 1/125–1/500 for freezing movement; 1–10s if you want cloud smear with ND
- Tripod recommended for low light
Pro tip: Arrive at least 45 minutes early because often the most interesting color happens before the sun clears the horizon.
📸Learn for free!
➡️ FREE Wallpapers and Guides
➡️ DISCOUNTS on future Tours & Tutorials
➡️ TIPS for improving Your photography
You can unsubscribe at anytime.
Use Strong Foregrounds to Add Depth & Scale: Mountains Photography Tips
Mountains by themselves can feel distant and abstract. A purposeful foreground connects the viewer into the scene; it gives scale, anchors composition, and provides a visual journey from near to far.
Without a foreground anchor, epic peaks can lose presence; with one, they feel inhabited and believable. Think of it as creating an invitation for example wildflowers, boulders, winding trails, or even a still alpine pond can act as stepping stones that guide the eye naturally into the frame.
Foregrounds also establish scale: a single tree against towering peaks reminds the viewer just how massive the mountains really are.
Human eyes crave depth, and photographs flatten three dimensions into two. Without strong foregrounds, mountain images can look flat or postcard-like. Adding layers restores that sense of vastness, turning a pretty scene into a photograph that feels immersive.
Foregrounds don’t just decorate the image; they help tell the story of place, season, and scale which are key ingredients in building compelling, authoritative mountain photography.
Field-tested camera settings
- Lens: 14–24mm or 16–35mm
- Aperture: f/8–f/16 for deep DOF (use focus stacking if foreground is inches from lens)
- ISO: 50–200
- Shutter: adjust for exposure; tripod if >1/60s
Pro tip: When using extreme wide, physically get low and put the foreground subject close to the lens (within 1 foot) to exaggerate depth.


Scout, Plan, Then Pivot
Scouting is pattern recognition; you learn which angles consistently frame the peaks, where natural leading lines occur, and which foregrounds anchor the composition.
Planning ensures you’re in the right place at the right time, ready for golden light or shifting weather. But no matter how carefully you prepare, mountains rarely follow the script. That’s why the ability to pivot (shifting locations, reframing a subject, or embracing unexpected conditions) is just as important as the plan itself.
Successful mountain photography is equal parts preparation and improvisation. Scouting gives you a mental map of possibilities, planning maximizes your odds of success, and pivoting allows you to adapt when reality diverges from your expectations.
Treat your plan as a hypothesis, and your fieldwork as a series of experiments. That flexibility is what separates seasoned photographers from frustrated ones.
Field-tested camera settings (for scouting)
- Keep a compact kit: 24–70mm, 70–200mm, small tripod
- Settings: aperture f/5.6–f/8 to judge framing, ISO 100–400
- Cell phone ready for capturing multiple composition possibilities
Pro tip: Mark GPS waypoints on your phone and take multiple composition images with your phone then return at the optimal light.
Bracket Exposures and use Blending
Mountain scenes often exceed sensor DR. Bracketing captures clean highlight + shadow detail you can blend later. Leverage dynamic range carefully. Mountain scenes often include bright skies and deep shadows in the same frame, pushing a camera’s dynamic range beyond its limits.
HDR, whether bracketed exposures or manual blending, lets you balance detail across highlights and shadows. The key is restraint: you want a natural look, not the over-processed HDR effect that flattens images. Updates to HDR processes within available post processing software has led to vast improvements and control over the results from HDR blending. You’d have to try really hard to get the over=processed HDR effect of the past.
Field-tested camera settings
- Bracket 3–7 frames at 1–2 EV steps depending on scene contrast
- Aperture: f/8–f/11 (keep consistent across frames)
- ISO: base (50–200)
- Use tripod and remote or mirror-lockup to reduce movement
Pro tip: If wind is present, watch for movement between frames; wind-blown foregrounds can complicate blending; consider focus stacking or masking.
Choose Lenses for Mood: Wide to show scale, Telephoto to Compress Layers
Lens choice changes the story. Wide = grandeur and immersive feel; long lens = intimacy and layer compression.
While most people instinctively reach for wide-angle lenses in the mountains, telephotos unlock a whole different visual language. They allow you to compress distance, stacking ridges, peaks, and valleys into graphic, almost abstract layers.
This creates a mood of grandeur and scale that the eye doesn’t naturally see. Telephotos are also excellent for isolating subjects like a single jagged spire lit by dawn light, or even wildlife against a sweeping alpine backdrop.
Field-tested camera settings
- Wide: 14–35mm, f/8–f/11, ISO 50–100
- Mid: 24–70mm, f/5.6–f/11, versatile on the move
- Tele: 70–200mm or 100–400mm, f/5.6–f/8, higher ISO if handheld
Pro tip: Carry one zoom and one prime/tele for flexibility; primes are great for dawn/dusk when you need low-light speed.
Use Polarizers and ND filters Strategically
Filters are some of the most powerful tools a mountain photographer can carry. A circular polarizer can transform a midday scene by deepening blue skies, reducing glare on rocks or water, and helping clouds pop with contrast.
Neutral Density (ND) filters, on the other hand, allow you to slow your shutter speed for silky waterfalls, moving clouds, or fog drifting across ridgelines. Both are about control and shaping light in-camera rather than relying solely on post-processing.
Field-tested camera settings
- Polarizers: Rotate until you see reflections reduce and contrast increase, but avoid over-polarizing (which can darken skies unevenly at wide angles). Works best at 90° to the sun.
- Example settings: f/11, 1/125 sec, ISO 100 on a bright day.
- Ideal scenes: mountain lakes, snowy peaks under blue skies, forests with wet leaves.
- ND filters: Use strong ND (6–10 stops) for long exposures of waterfalls, streams, or cloud movement. Use lighter ND (3–4 stops) when you just need a subtle slow-down.
- Example settings: f/16, 10–30 seconds, ISO 100 with a 6-stop ND for waterfalls in shaded valleys.
- Ideal scenes: waterfalls, mountain streams, low clouds moving across ridgelines.
- Combination use: Stack a polarizer with a light ND for even more creative control; perfect when photographing alpine lakes where you want both glare reduction and longer shutter speeds.
Pro tip: Mark polarizer orientation before ND stacking so you can quickly recompose without re-rotating under a cold wind.
Capture Scale and Emotion by Including a Human Element
Mountains are massive however, their scale is easily lost in a photo. A lone hiker, a tent, or even a winding trail adds context and helps viewers grasp just how huge the scene is.
Including a human element also adds storytelling, making the image relatable.
Without a sense of scale, mountains can feel oddly flat in photographs; their immensity doesn’t always translate to two dimensions. Including people in your frame bridges that gap.
A tiny hiker on a ridgeline or a figure standing beneath a glacier instantly communicates the true magnitude of the scene. Beyond scale, people add an emotional connection, reminding viewers of our relationship with wild places.
Practical Advice: Scout your composition first, then add the subject. Don’t zoom in too tightly; let the landscape dominate.
Position people off-center to follow the rule of thirds and create balance. Use contrasting colors (like a bright jacket) so the figure doesn’t get lost in the terrain.
Field-tested camera settings
- For silhouettes: meter for sky (underexpose foreground), 24–70mm, f/8, ISO 100–200
- For environmental portraits: 35–85mm, f/4–f/8 (depending on desired DOF), fill with reflector if needed
Pro tip: Coach the subject’s posture; gazes that lead toward the main subject help the viewer’s eye travel.
Embrace Bad Weather; Fog, Rain, and Snow add Atmosphere
Mountains have their own microclimates, and conditions can change in minutes. While many photographers pack up when clouds roll in, those shifting skies often create the most dramatic images.
Mist hugging ridgelines, storm light breaking through, or fresh snow dusting peaks can elevate your shots beyond postcard-perfect blue skies.
Low-hanging clouds can soften harsh midday light, thunderstorms provide dynamic skies, and rain can deepen colors and textures. Instead of resisting, embrace the volatility as it’s one of the mountain’s gifts to photographers.
Practical Advice: Instead of avoiding bad weather, plan for it. Carry weather-sealed gear or at least a rain cover for your camera. Bad weather usually makes for great photography.
Clouds and fog add layers of depth and mystery, while storms often create contrast that flat light can’t match. Early snowstorms in autumn or clearing rain in spring are particularly photogenic.
Field-tested camera settings
- Keep a weather-sealed body or rain cover; wipe lens often
- Aperture: f/4–f/8 depending on desired depth of field
- ISO: raise slightly in low contrast (200–800) but watch noise
- Settings for storms: Wide lens, f/11, ISO 100, tripod-mounted with 1–2 seconds to catch lightning or dramatic cloud movement.
- Fog: Telephoto at f/4–f/5.6 to isolate trees or peaks emerging from mist.
Pro tip: Bring a small microfiber, lens hood, and waterproof bag for quick protection — being ready lets you shoot while others pack up.
Master Composition Rules Then break them Intentionally
Learn the basics such as the rule of thirds, leading lines, and balance; so you can bend them with purpose. Rules create structure; breaking them thoughtfully creates personality.
Sometimes the most striking mountain photographs come from ignoring convention: placing the peak dead center, tilting the horizon, or letting negative space dominate.
Without understanding composition fundamentals, breaking them looks accidental.
Once you know the rules, pushing past them adds voice and originality to your work. This is how a familiar mountain scene transforms from a postcard view into something uniquely yours.
Field-tested camera settings
- Use rule of thirds/grid for initial framing (enable viewfinder grid)
- For intentional breaks, try center composition or place horizon mid-frame
Pro tip: Carry composition checklists in your head: horizon level, edge clutter, peak breathing room, and focal anchor.
Watch the Edges and the Peak Lines
Small framing errors like cutting off a mountain peak, letting a stray tree branch intrude, or leaving a sliver of bright sky at the corner can ruin an otherwise great frame. In mountain photography, the majesty is often in the scale and completeness of the range, so precision at the edges matters just as much as the subject in the center.
Think of your composition as a container: if a peak is too close to the top, the whole image feels cramped and incomplete. On the other hand, a little extra breathing room above the highest ridge lets the scene feel expansive and dignified.
The same goes for side edges; cropping too tight on a ridge or valley can make the composition feel unbalanced, while watching carefully allows the landscape to unfold naturally within the frame.
Mountains demand respect in how they’re framed. Viewers instinctively notice when a summit is missing or a distracting edge pulls the eye away.
Clean edges and thoughtfully included peaks elevate your work from snapshot to professional-level mountain photography. Slowing down, scanning the corners of your frame, and even taking a second “insurance shot” with a wider crop gives you options to refine in post without losing integrity in the field.
It’s one of those small, disciplined habits that quietly separates skilled mountain photographers from casual shooters.
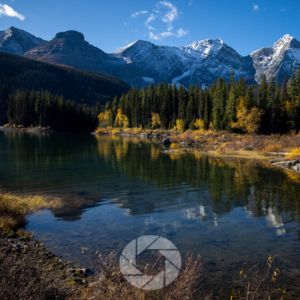
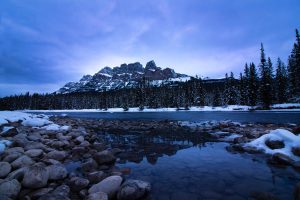
The scene below at Wedge Pond in Kananaskis, Alberta, demonstrates what not to do at the top of the frame; the mountain peaks are crowded by the top edge in the frame, creating unintended tension in the image (just another reason to go back!).

Field-tested camera settings
- Use a live histogram and single shot framing check
- Keep tripod head loose to nudge composition without re-setup
- Try moving the camera up/down and moving a few feet to the left or right to perfect your composition
- Create a buffer in the frame: take a wider shot than necessary and crop in slightly later if the scene calls for it
Experiment with Black & White

Mountains are naturally high-contrast environments, with strong shapes, shadows, and textures.
Stripping away color can emphasize these raw qualities, transforming a scene into something timeless and powerful.
Black & white is especially effective in harsh midday light, stormy weather, or when color doesn’t contribute much to the image.
Field-tested camera settings
- Shoot in RAW, but preview in monochrome mode if your camera allows. This helps you compose with tones instead of color.
Expose for Highlights, then Recover Shadows Carefully
Preserving highlights in subjects such as snowcaps or glowing clouds prevents clipped whites that can’t be fixed during post. By slightly underexposing, you protect those bright details and leave room to bring up the shadows later.
Modern sensors handle shadow recovery better than blown highlights, so it’s safer to lift dark valleys or ridges in post than to lose the brilliance of snow or sky forever. A quick histogram check or turning on your camera’s highlight alert helps you stay on track.
Mountain scenes often push your camera’s dynamic range to the limit. Prioritizing highlights keeps images crisp and dramatic, ensuring your peaks glow instead of wash out.
Field-tested camera settings
- Use highlight alert/clipping preview on camera
- Slight negative exposure compensation (-0.3 to -1 EV) for snowy or bright scenes
- Combine with shadow recovery in RAW
Pro tip: On tricky scenes, bracket and check histogram: make the highlight line happy first.
Take Advantage of Seasonal Shifts
Mountains change dramatically with the seasons and each one offers unique photographic opportunities.
Seasonal photography in the mountains tells stories. Spring brings melting snow and waterfalls, summer opens alpine meadows, autumn transforms slopes with golden larches and aspens, and winter cloaks everything in white stillness.
Returning to the same location across seasons creates a portfolio of diverse interpretations and tells a longer story; frozen peaks, fall foliage, and wildflower season.
Field-tested camera settings
- Spring: Use ND filters for waterfalls; f/11, 1/2–2 seconds.
- Summer: Wide lens, f/16 for flower-filled meadows.
- Autumn: Polarizer for crisp skies and foliage color.
- Winter: Spot-meter snow for accuracy, +1 EV exposure compensation.
Prioritize Safety and Logistics
No photo is worth risking your safety. Mountain photography often means exposure to cold, altitude, wildlife, or unstable terrain.
Planning ahead with the right clothing, gear, and awareness ensures you can keep returning to the mountains to shoot. Knowledge of safety also builds trust with your audience, showing that you respect the environment and yourself.
Field-tested checklist
- Share itinerary and ETA with a contact
- Carry extra layers, headlamp, map, and basic emergency kit
- Check local weather and avalanche advisories
- Carry a GPS that can also communicate to others in case of emergency
Pro tip: Learn basic navigation and first-aid as they increase confidence and creative freedom.
Post-process with Restraint: Preserve Texture and Atmosphere
Editing should enhance the mood, not overwrite it. Keep tonal shifts subtle and protect fine textures so the scene feels natural.
Over-processing can strip away the atmosphere that makes mountain landscapes compelling. By holding back, you preserve realism, depth, and the emotional pull of the place.
Field-tested post settings
- Start RAW → White balance warm/cool as needed → Clarity +10 to +25 for detail → Local dodging/burning → Gentle tone curve S
- Avoid oversaturation; use targeted HSL tweaks
Pro tip: Export at multiple sizes and do final sharpening for web/print separately.
Conclusion
If you take anything away from these mountain photography tips, let it be this: approach each outing with equal parts preparation and openness.
Respect the environment, trust your instincts, and give yourself permission to experiment. The more time you spend out there, the stronger your connection becomes and your images will reflect that authenticity.
- Mountain Photography Tips
- Fast Reference Chart – Quick Settings by Mountain Scenario
- Mountain Photography Gear
- 15 Mountain Photography Tips
- Hunt for the Light; Golden hour, Blue hour, Alpenglow and Crepuscular drama
- Use Strong Foregrounds to Add Depth & Scale: Mountains Photography Tips
- Scout, Plan, Then Pivot
- Bracket Exposures and use Blending
- Choose Lenses for Mood: Wide to show scale, Telephoto to Compress Layers
- Use Polarizers and ND filters Strategically
- Capture Scale and Emotion by Including a Human Element
- Embrace Bad Weather; Fog, Rain, and Snow add Atmosphere
- Master Composition Rules Then break them Intentionally
- Watch the Edges and the Peak Lines
- Experiment with Black & White
- Expose for Highlights, then Recover Shadows Carefully
- Take Advantage of Seasonal Shifts
- Prioritize Safety and Logistics
- Post-process with Restraint: Preserve Texture and Atmosphere
- Conclusion
- Sources & Further Reading
- 📸Learn for free!
Sources & Further Reading
- Mountain Photography Tips. Photography Life
- 7 Tips for Photographing Mountains. Nature TTL
- Mountain Photography Tips—Part 1. alpineexposures.com
- Five Tips for Better Mountain Photos. Fstoppers
- How to Take Better Mountainscape Photographs (lens choices). Western Hunter