Learning how to control exposure is one of the most important steps in becoming confident with your camera.
While aperture, shutter speed, and ISO get most of the attention, there’s another crucial tool that often confuses beginners and amateurs: metering mode in photography.
In this guide, we’ll break down what metering mode in photography is, explore the main modes (matrix, center-weighted, spot), and explain how to use them for landscapes and beyond.
I receive a small commission from links in this post, thank you for your support
Metering Modes in Photography: Spot, Evaluative, and Center Weighted
What Is Metering Mode in Photography?
At its simplest, metering mode in photography is how your camera measures the brightness of a scene to suggest or set an exposure. Think of it as the camera’s “light-reading method.”
Metering mode tells your camera how to read light in a scene, and which parts of the frame to prioritize when calculating exposure.
Get it right, and your images balance shadows and highlights beautifully. Get it wrong, and you might end up with blown-out skies, muddy shadows, or underexposed subjects.
Different metering modes analyze different parts of the frame. For example:
- Some look at the entire scene evenly.
- Some give more weight to the center.
- Others only evaluate a tiny area you select.
Why does this matter? Because light isn’t consistent. Photographing a snowy mountain in winter requires a very different metering approach than photographing a backlit forest or a fiery sunset. By choosing the right mode, you help your camera prioritize the light that matters most to your composition.

Discover Your Next Journey – These Tours are designed for people who connect with light and landscape.
Metering Mode Quick Reference Chart
| Mode | What It Does | Best For | Tips & Notes |
|---|---|---|---|
| Matrix / Evaluative | Reads the entire frame, balancing light across multiple zones. | Landscapes, general photography, complex scenes with varied light. | Default mode for most beginners. Reliable in most conditions; check histogram for balance. |
| Center-Weighted | Prioritizes exposure in the center of the frame, with less weight on edges. | Subjects in the middle (mountains, trees, portraits), moderate contrast scenes. | Great when main subject dominates composition. Adds stability, like “Earth.” |
| Spot Metering | Measures light in a very small area (focus point). | High-contrast scenes (sunsets, backlit subjects, stage lights). | Use carefully; can blow out highlights/shadows if subject isn’t chosen precisely. |
| Partial Metering | Reads a larger area than spot, but smaller than center-weighted (not all cameras). | Backlit scenes, portraits with bright skies, high-contrast light. | Less precise than spot, but safer for beginners learning exposure. |
| Highlight-Weighted | Exposes to protect bright highlights. | Concerts, sunsets, snowy scenes, fiery light sources. | Useful for taming highlights; ensures detail in bright areas without clipping. |
Camera Metering: The Basics
Camera metering is the broader concept behind these modes. Every digital camera (and even film cameras with built-in light meters) measures brightness and suggests exposure settings.
Cameras typically assume the world is a neutral gray; about 18% gray, to be precise. This is their “baseline.” The metering system tries to adjust exposure so that the scene averages out to that tone.
This works fine in balanced lighting but struggles in extreme conditions:
- Snow scenes often come out too dark because the camera tries to make white look gray.
- Night scenes can be overexposed for the same reason.
That’s why understanding metering modes and how to override them when necessary is so important.
Center-Weighted Metering
Center-weighted metering was the standard mode in many older cameras and is still useful today. As the name suggests, it prioritizes the center of the frame but still considers the surrounding area.
This mode is helpful when your subject is in the middle of your composition, and the surrounding brightness varies but isn’t the focus. For example:
- Portraits where your subject is centered against a bright background.
- Scenes with moderate contrast where you don’t need precision but want reliable balance.
Matrix Metering Mode
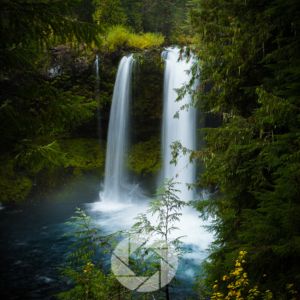
For landscapes, matrix metering mode (sometimes called evaluative metering) is often the best choice. It divides the frame into multiple zones, evaluates the light in each, and uses algorithms (sometimes even referencing your focus point) to balance the whole scene.
This is especially powerful when photographing wide, complex landscapes. Imagine a valley at sunrise: bright sky, shadowed forest, shimmering river. Matrix metering samples it all, then gives you a balanced exposure that preserves both highlights and shadows.
How to Use Metering in Photography
So how do you put all this into practice? Here are some key steps for how to use metering in photography:
- Choose your mode intentionally. Don’t just leave it on matrix because it’s the default; think about your subject and light conditions.
- Check your histogram. After taking a shot, review the histogram to see if highlights or shadows are being clipped. This is your best reality check.
- Use exposure compensation. If snow looks gray, dial in +1 stop. If bright skies are blowing out, try –1 stop. Your camera’s meter is a guide, not a law.
- Combine with manual mode. For tricky lighting (like sunsets or high-contrast forests), start with your camera’s meter, then refine manually for precision.
Highlights (like sun, firelight, or reflections) can easily overwhelm your exposure. By learning to read your meter and adjust compensation, you tame the flames and preserve balance.
What Mode Is Best for Landscape Photography?
This is the big question for beginners: what mode is best for landscape photography?
In most cases, matrix metering is the most reliable. It reads the entire scene and helps balance bright skies with darker foregrounds. This is why many landscape photographers keep their cameras on matrix most of the time.
But there are exceptions:
- Center-weighted metering is useful if your composition is dominated by a central subject, like a mountain peak or lone tree.
- Spot metering (not covered in detail above, but worth mentioning) is helpful when you want to expose precisely for one area like the glowing edge of a sunset cloud.
The truth is, there isn’t a single “best” mode. The best metering mode for landscapes is the one that aligns with your vision of the scene.
Like a river reflecting both sky and stone, metering is about balance. Sometimes you emphasize one element, sometimes another but always in harmony with the whole.
Landscape Metering Modes by Season
| Season | Lighting Challenge | Recommended Metering Mode | Tips & Elemental Tie-In |
|---|---|---|---|
| Winter | Snow scenes fool the meter into underexposing. | Matrix or Highlight-Weighted | Add +1 exposure compensation to keep snow bright. Highlights are strong in reflective snowlight. |
| Spring | Hazy skies, mixed clouds, budding greens. | Matrix Metering | Helps balance shifting skies and ground. Use the meter to harmonize contrast. |
| Summer | Harsh midday light, bright sun, high contrast. | Spot or Center-Weighted | Expose for your subject, or meter highlights to avoid blowouts. ND filters help tame highlights. |
| Autumn | Vibrant foliage, crisp skies, softer light. | Matrix Metering | Perfect for saturated, balanced exposures. Use polarizer + matrix to capture Earth tones and deep skies. |
| All Year | Reflective lakes, rivers, or wet rocks. | Spot Metering + Polarizer | Expose carefully for reflections and use CPL to reveal Water’s clarity. |
Seasonal and Elemental Perspectives
Metering isn’t static; it changes with the seasons.
- Winter: Snow fools your camera into underexposing. Add positive exposure compensation.
- Spring: Hazy skies and shifting clouds benefit from matrix metering to balance atmosphere.
- Summer: Harsh light can overwhelm highlights. Spot or center-weighted metering may help.
- Autumn: Rich, saturated tones work beautifully with matrix metering to capture full color.
This perspective reminds us that metering isn’t about strict rules; it’s about harmony, choosing how much light to let in, just as we choose how to move with natural cycles.
Learn more about exposure, aperture, and the exposure triangle with these posts:
- Is it better to under or overexpose
- Exposure triangle for beginners
- Perfect Your aperture for Landscapes
- What is aperture and Depth of Field
- ISO in Photography
Conclusion
Understanding metering mode in photography gives you greater control over exposure and creative expression. From matrix to center-weighted to spot, each mode offers a different way of balancing light.
For landscapes, matrix metering is usually the best starting point. But as you grow, experimenting with other modes and learning how to adjust with histograms and compensation, will deepen your ability to see and shape light.
- Metering Modes in Photography: Spot, Evaluative, and Center Weighted
- What Is Metering Mode in Photography?
- Metering Mode Quick Reference Chart
- Camera Metering: The Basics
- Center-Weighted Metering
- Matrix Metering Mode
- How to Use Metering in Photography
- What Mode Is Best for Landscape Photography?
- Landscape Metering Modes by Season
- Seasonal and Elemental Perspectives
- Conclusion
- FAQs
- Learn more about exposure, aperture, and the exposure triangle with these posts:
FAQs
Matrix (evaluative) metering is usually the most forgiving and versatile. Start here until you’re comfortable experimenting.
Matrix reads the entire frame, center-weighted prioritizes the middle, and spot only reads a tiny area you choose. Each has strengths depending on the situation.
Use matrix metering as a base, check your histogram, and adjust with exposure compensation as needed.
If the graph is bunched to the left, your scene is too dark; bunched to the right, too bright. Use this to double-check your meter’s recommendation.
In high-contrast midday sun, consider spot metering for your subject or use ND filters to tame highlights while keeping a balanced exposure.