Telephoto Landscape Photography transforms vast, chaotic scenes into intimate narratives of light, form, and spirit. Telephoto lenses allow me articulate nature’s hidden unity.
Once distant mountain ranges, now they tell their stories in clarity and compression.
If you’ve ever felt overwhelmed by a huge vista, a telephoto is the calm, decisive answer that we will explore in this post.
I receive commissions from links in this post, thank you for your support
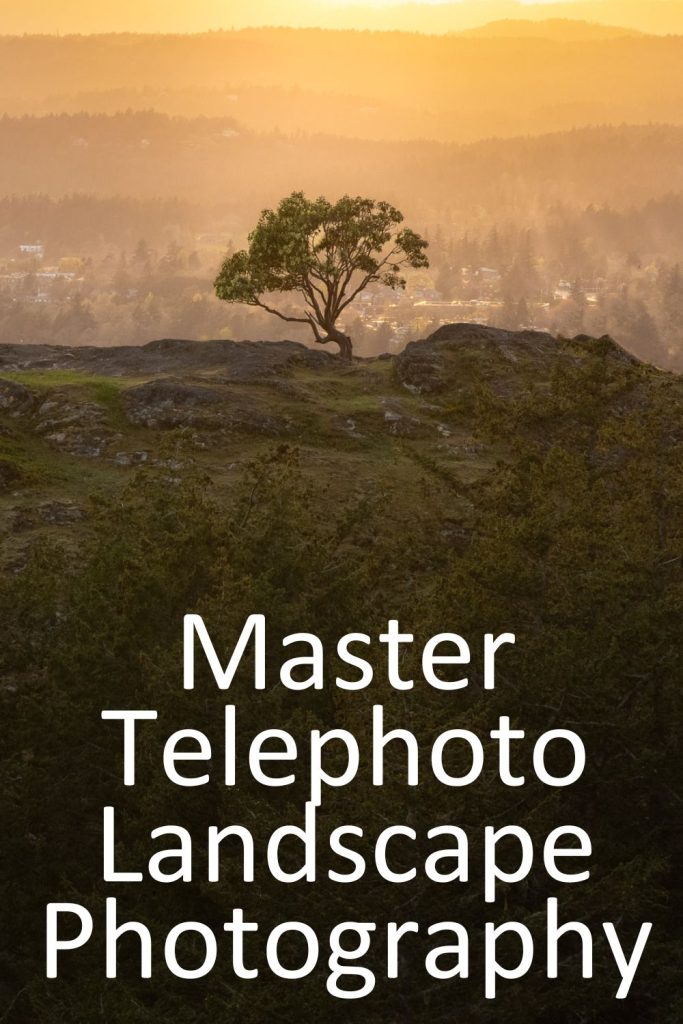
Master Telephoto Landscape Photography
Telephoto Landscape Photography: Why It Belongs in Every Kit
Long lenses compress space and simplify scenes, letting you isolate the one gesture that says it all: a sun-struck peak, a lone tree, a ribbon of light.
That “compression” look isn’t magic glass; it’s the perspective you create by stepping back and narrowing your angle of view, which makes background planes appear closer together for graphic power.
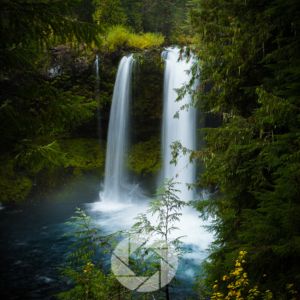
- Compression for drama: Distant layers stack together for example ridge behind ridge, dune behind dune creating depth without wide-angle distortion. Peaks feel taller, closer, more monumental.
- Isolation for clarity: One tree on a ridgeline. A sunlit barn in a storm. Foam traces snaking between sea stacks. Long focal lengths strip away clutter so your subject reads instantly.
- Light harvesting: Far-off light often looks better than what’s at your feet for example sunbreaks on a distant hillside, spot-lights through storm gaps, mist ignited by sunrise. Telephoto is how you capture it.
My Telephoto Lenses
- Mid Range Zoom (Canon 24-105mm)
- Long Range Zoom (100-500mm)
Telephoto Landscape Photography: Settings to start
- Daylight layers: 200 mm, f/11, ISO 100, 1/125–1/250 s (tripod if windy).
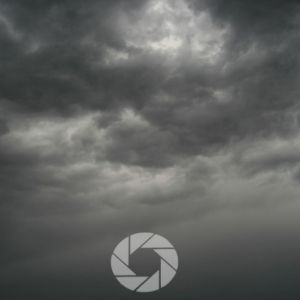
- Storm beams: 300 mm, f/8, ISO 200, -0.7 EV, bracket ±1 EV.
- Minimal abstracts: 400 mm, f/8, ISO 100, 1/8–1/30 s with 3–6-stop ND.
- Handheld insurance: aim for 1/(focal length × 2) shutter, IBIS/VR on.
These are starting points—adjust for wind, subject movement, and your stabilization.
| Scenario | Focal Length | Aperture | Shutter Speed | ISO | Notes |
|---|---|---|---|---|---|
| Backlit mist in forests | 200–400mm | f/8–f/11 | 1/500s | 200–800 | Expose for highlights; silhouette trunks for graphic impact |
| Layered mountain ridges | 135–300mm | f/8–f/11 | 1/400s | 100–400 | Side or backlight for separation; slight dehaze in post |
| Sea stacks at sunset | 200–400mm | f/8 | 1/250–1/1000s | 100–400 | Polarizer for glare; watch heat shimmer over water |
| Minimalist abstracts | 300–600mm | f/5.6–f/8 | 1/1000s | 100–400 | Use negative space; expose for midtones for rich color |
| Moonrise over a peak | 400–600mm | f/8–f/11 | 1/60–1/250s | 100–400 | Plan alignment; bracket for moon detail vs land |
| Distant rain shafts/light beams | 100–300mm | f/8 | 1/500s | 200–800 | Fast changes use burst mode and exposure comp handy |
Composition with a Long Lens: Layers, Lines, and Light
Think like a sculptor. With a telephoto, you’re not “taking it all in”; you’re carving pieces from the scene. Use lines, layers, and light to simplify complexities. Long lenses demonstrate scene hierarchy from foreground trees to midground ridges and glowing background peaks, with each plane harmonizing.
- Layers: Look for repeating planes (mountain ridges, sea stacks, rolling fields). Place the brightest or most textured layer where you want attention to land.
- Lines: Use diagonals from ridgelines, river cuts, and snow tongues to direct the eye. Telephoto exaggerates these lines into bold graphic shapes.
- Light: Backlight for glow (trees rim-lit in mist), side-light for texture (rock faces, sand ripples), front light for clean, pastel minimalism.
Pro tip: pre-visualize in black & white through the EVF (most cameras can preview mono). It helps you judge shape and contrast without color distraction.
Telephoto Landscape Photography and Focal Range
- 70–200mm: Versatile for “near-far at a distance.” Perfect for mid-ground compression, clean horizons, and picking details from a wide scene. Often the sharpest, easiest to stabilize, and lightest to carry.
- 100–400mm or 70–300mm: My everyday tele landscape range. Enough reach for distant light pockets, sea stacks, or mountain layers, but still handholdable.
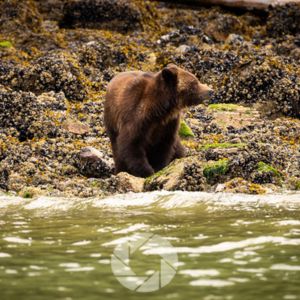
- 150–600mm: Specialist reach for deep compression, moonrise over peaks, far-off storm shafts, or minimalist abstracts carved from chaos. Use when the atmosphere is clean and your support is solid. Great for wildlife.
If you’re newer to long glass, a 70–200mm or 100–400mm is the sweet spot. I currently use this long range Zoom (100-500mm) and this versatile Zoom (Canon 24-105mm).
Scout, Then Wait and Watch the Light
Telephoto landscapes reward pre-planning and patience. Long glass sculpts light like a spotlight on the land. Watch for shafts piercing storm decks, sidelight raking talus, or backlit fog; telephoto perspectives make these relationships bolder and more legible.
- Angles: Mark ridges, overlooks, and shorelines that line up layers and remove foreground clutter.
- Timing: Track when the sun skims across your subject (side-light texture) or slips behind it (backlit glow).
- Atmosphere: Haze, humidity, smoke, sea spray, and heat shimmer can soften or ruin distant detail. Cool mornings after a front clears often give the cleanest air.
After the storm: sunrise on a clear-after-storm day for crisp layers; storm edges at golden hour for beams and drama.
Exposure & Settings for Telephoto Landscape Photography
Snowy peaks and cloud edges clip easily. Expose to preserve highlight texture and lift shadows in RAW. Telephoto scenes often tolerate more shadow lift because there’s less fine micro-contrast in the emptier mid-tones of the distant air.
Bracket when the dynamic range jumps (sun-shafts, reflective water). This mirrors best-practice “protect highlights first” advice you’ll see across landscape education.
- Mode: Aperture Priority or Manual with Auto-ISO
- Aperture: f/8–f/11 for maximum lens sharpness and depth; f/5.6–f/8 for speed or softer backgrounds
- Shutter speed: Aim for 1 / (2 × focal length) or faster handheld (e.g., 1/800s at 200mm); on a tripod with static scenes, go as slow as needed
- ISO: Keep it low (100–400) for clean skies; raise ISO to protect sharpness if wind or subject movement intrudes
- Stabilization: Turn IS/VR/OSS on when handheld; off on a locked-down tripod for most systems (test your lens)
For rippling mirage or wind-shaken foliage, prioritize shutter speed over ISO purity; sharp with a bit of noise beats blurry and “clean.”
Rock-Solid Focus and Stability
- Tripod discipline: Extend thicker leg sections first, hang a bag from the hook, and use a remote or 2-sec timer.
- Focus: Use single-point AF on high-contrast edges; switch to manual for static subjects and always magnify to confirm.
- Micro-shake killers: turn off Image stabilization both in camera and on lens, gentle shutter press (or electronic first curtain – use a remote trigger), and steady breathing. In gusts, press lightly down on the lens collar to dampen vibration.
Working the Light: Backlight, Sideline, Storm Edge
Backlight reveals textures; side lighting sculptural forms; shafts through haze make air tangible. Telephotos emphasize these elemental relationships.
- Backlight: Trees, sea spray, and mist glow. Expose for the highlights; let shadows fall to silhouette for graphic power.
- Sidelight: Rakes across ridges and rock, revealing texture and giving three-dimensionality.
- Storm edge: Be ready when clouds tear open; shafts of light across distant hills become telephoto catnip.
Remember the elements: air (atmospheric depth), fire (warm, low sun), water (specular highlights), earth (forms and strata).
Storytelling with Compression
Telephoto compression is a narrative tool. Stack a sunlit town against looming mountains for “humans vs. grandeur.” Make sea stacks crowd together for a sense of myth. Align a tiny lighthouse beneath a giant moon. Ask: What relationship between subjects tells the story I feel? Then dial your focal length to tune that relationship.
Minimalism at a Distance
Long lenses are superb for abstract landscapes. This is because long lenses strip landscapes down to lines, light and form. I use them to isolate geology, color, or weather patterns.
- A single illuminated tree on a dark slope.
- Two color fields: gold grass and blue lake, bisected by a diagonal.
- Repeating textures: dune crests, snow ridges, terraced farmland.
Underexpose slightly for richer color and fewer sky distractions; ETTR is great when you need maximum tonal detail, but for graphic minimalism, a controlled, darker exposure is my preferred look.
Telephoto Panoramas: Big Scenes, Clean Geometry
When a scene is wider than your focal length can frame and you want compression, shoot a pano. Combine compression with wide vibe and stitch vertical telephoto frames. Keeps depth without distortion.
- Vertical orientation, 30% overlap
- Manual exposure and manual white balance for consistency
- Lock focus and rotate around the lens’s entrance pupil (a nodal rail helps)
- Stitch in Lightroom/Photoshop; correct subtle curvature with boundary warp
Result: ultra-wide without wide-angle distortion.
Filters for Long Glass
Often, the best “filter” at long focal lengths is simply timing: soft, angled light and clean air.
- Polarizers: Excellent for cutting glare on distant water and saturating foliage, but watch for uneven skies at wide fields. Rotate to taste; back off if the sky bands.
- ND filters: Rarely needed unless you’re doing telephoto long-exposure water or cloud streaks. Stability must be perfect.
- Clear/UV: Helpful as salt-spray shields in seascapes.
Beating Heat Haze and Mirage
Shoot cooler mornings or high angles to avoid shimmering layers. Compression exaggerates haze so pick clean moments to frame distant clarity.
- Shoot early/late when the ground is cool and air layers are stable.
- Shorter distances: If shimmer ruins the far ridge, find a closer subject at the same focal length to retain the look.
- Higher shutter speeds can help, but haze is refractive and not just motion. Think timing and distance first.
Ethics & Telephoto Lenses: Long Glass, Light Touch
Telephoto lets you respect distance from wildlife, fragile terrain, and private property while still making powerful images. That aligns with Leave No Trace and the deeper reverence many of us carry in wild places.
Learn more about Leave No Trace (LNT), Eco-friendly Travel, and Ethics for the Algo
Post-Processing Priorities for Long-Lens Landscapes
- Micro-contrast over global crunch: Use Texture/Clarity selectively on your subject; keep skies and distant layers graceful.
- Dehaze with restraint: Great for cutting haze in mid-ground however it’s easy to overdo in skies.
- Color separation: HSL to separate cool shadowed layers from warm lit one which then enhances compression feel.
- Crop for edge discipline: Long lenses exaggerate framing errors; clean edges = stronger geometry.
Post Processing in the Digital Age
Learn more about post processing to reveal emotion, truth in editing, and using editing to connect with others through one of my posts below.
Conclusion
Telephoto Landscape Photography gives you the power to simplify chaos, amplify light, and tell tighter, truer stories about the land. When the elements line up, a long lens turns vastness into something tangible.
📸Learn for free!
➡️ FREE Wallpapers and Guides
➡️ DISCOUNTS on future Tours & Tutorials
➡️ TIPS for improving Your photography

You can unsubscribe at anytime.
- Master Telephoto Landscape Photography
- Telephoto Landscape Photography: Why It Belongs in Every Kit
- My Telephoto Lenses
- Telephoto Landscape Photography: Settings to start
- Composition with a Long Lens: Layers, Lines, and Light
- Telephoto Landscape Photography and Focal Range
- Scout, Then Wait and Watch the Light
- Exposure & Settings for Telephoto Landscape Photography
- Rock-Solid Focus and Stability
- Working the Light: Backlight, Sideline, Storm Edge
- Storytelling with Compression
- Minimalism at a Distance
- Telephoto Panoramas: Big Scenes, Clean Geometry
- Filters for Long Glass
- Beating Heat Haze and Mirage
- Ethics & Telephoto Lenses: Long Glass, Light Touch
- Post-Processing Priorities for Long-Lens Landscapes
- Conclusion
- References
- Learn more about Leave No Trace (LNT), Eco-friendly Travel, and Ethics for the Algo
- Post Processing in the Digital Age
- 📸Learn for free!
References
- Digital Photography School – Telephoto Landscape Tips
https://digital-photography-school.com/tips-shooting-landscapes-telephoto-lens-2/ - Fstoppers – 5 Tips for Telephoto Landscape Photography
https://fstoppers.com/landscapes/5-tips-shooting-telephoto-landscape-photography-571709 - CaptureLandscapes – Reasons to Use Telezoom for Landscape
https://www.capturelandscapes.com/5-reasons-telezoom-landscape-photography/ - Learn & Support (Olympus) – Telephoto in Landscape Photography
https://learnandsupport.getolympus.com/learn-center/photography-tips/landscapes-nature/telephoto-landscapes-why-you-should-use-a-telephoto