When you’re first learning landscape photography, the term ISO in photography might seem technical and intimidating.
But understanding ISO is like learning to speak the language of light. It gives you the power to make intentional choices about brightness, noise, and overall image quality.
In this post, we’ll dive into ISO in photography, explore what ISO stands for and means, and guide you through using it effectively in your workflow.
ISO Meaning and Why it Matters to Your Landscape Photography
What Does ISO Mean in Photography?
What does ISO mean in photography? ISO originally comes from the acronym for the International Organization for Standardization. In film days, ISO (or ASA/DIN) rated how sensitive film was to light.
In digital photography, ISO is not about film but sensor amplification. It tells your camera how much to boost signal from the sensor when adjusting exposure. In short: the higher the ISO, the brighter your image, but also the more noise you’ll get.
What Is the Best ISO for Different Landscape Scenes?
Choosing the right ISO depends on what you’re shooting and the light you have:
- Daylight scenes: Stick with your camera’s base ISO (ISO 100 or 200). You’ll get crisp, clean shots with minimal noise .
- Golden hour or shade: Still keep ISO low, but if you need a faster shutter to freeze movement, raise it to around ISO 400–800.
- Windy foliage or flowing water: ISO 800–1600 helps you capture sharper movement without blurring.
- Night photography (astrophotography or moonlit landscapes): ISO 1600–3200 is common. You may find me shooting upwards of ISO 6400, depending on my histogram. Most modern cameras handle this range well, but test noise levels to know your gear’s limit.
📸Learn for free!
➡️ FREE Wallpapers and Guides
➡️ DISCOUNTS on future Tours & Tutorials
➡️ TIPS for improving Your photography

You can unsubscribe at anytime.
How Does ISO Affect a Photo?
ISO is one of the most powerful tools you can adjust in photography, but it’s also one of the most misunderstood. At its core, ISO affects how sensitive your camera’s sensor is to light.
But the real magic (and challenge) lies in understanding how ISO choices impact brightness, noise, and dynamic range, especially in landscape photography where detail and subtle tonal shifts matter.
ISO Quick Reference
- Brightness: Higher ISO amplifies sensor output, brightening your image when light is limited.
- Noise: Increasing ISO adds digital noise; speckled grains that reduce clarity and color fidelity. Your goal? Use the lowest possible ISO for your creative intent while still collecting as much image data as possible.
- Dynamic range: Higher ISO can shrink the range between deepest shadows and brightest highlights, potentially losing detail. You have adjust in order to avoid crushing the shadows and blowing out your highlights.
Brightness
At a technical level, increasing ISO doesn’t make your camera sensor “see” more light; it amplifies the signal from the sensor electronically. So when you raise ISO from 100 to 800 or even 3200, you’re telling the camera to boost the signal it’s receiving to brighten the image.
This is especially useful in low-light situations like blue hour, forest interiors, or astrophotography. But it comes at a cost (noise and less dynamic range).
Noise
The higher you push ISO, the more noise you’ll introduce into your image. Noise shows up as speckles, color blotches, or that sandpaper-like texture that becomes especially noticeable in shadows and smooth skies.
In landscape photography, where viewers expect clean skies, sharp textures, and rich details. Noise can really detract from your image’s quality. That’s why most landscape shooters prefer to shoot at ISO 100–200 and only raise it when absolutely necessary.
It’s not just about avoiding noise; it’s about preserving the clarity, sharpness, and tonal quality that define strong landscape work.
Dynamic Range
Here’s a deeper cut that many beginners overlook: raising your ISO also shrinks your camera’s dynamic range. That means you’ll capture less detail in both the brightest highlights and darkest shadows.
For example, a mountain illuminated by golden hour light might lose highlight detail in the snowcaps if your ISO is too high, while the forested valley might turn into a featureless black mass. You risk “blowing out” the highlights or “crushing” the shadows, both of which are difficult or impossible to recover in post-processing.
Keeping ISO low ensures that you retain more image data to work with later in Lightroom or Photoshop.
In Practice
Let’s say you’re shooting a misty morning by the lake. You’ve got beautiful reflected trees, fog rolling across the water, and low, moody light.
You want to keep your ISO at 100 to avoid noise in the fog; but that means you’ll likely need a tripod to slow your shutter speed and keep your aperture around ƒ/11 for maximum sharpness.
If you tried to handhold that shot and raised ISO to 1600 to compensate, you’d get a brighter image, yes; but one filled with noise and missing the subtle tonality that makes that moment magical.
In short: use ISO intentionally, not reactively. Start with the lowest ISO you can, then raise it only when your creative vision or lighting demands it. That discipline will make your landscape photos cleaner, richer, and far more impactful.
ISO vs Exposure: How ISO Affects the Whole Triangle
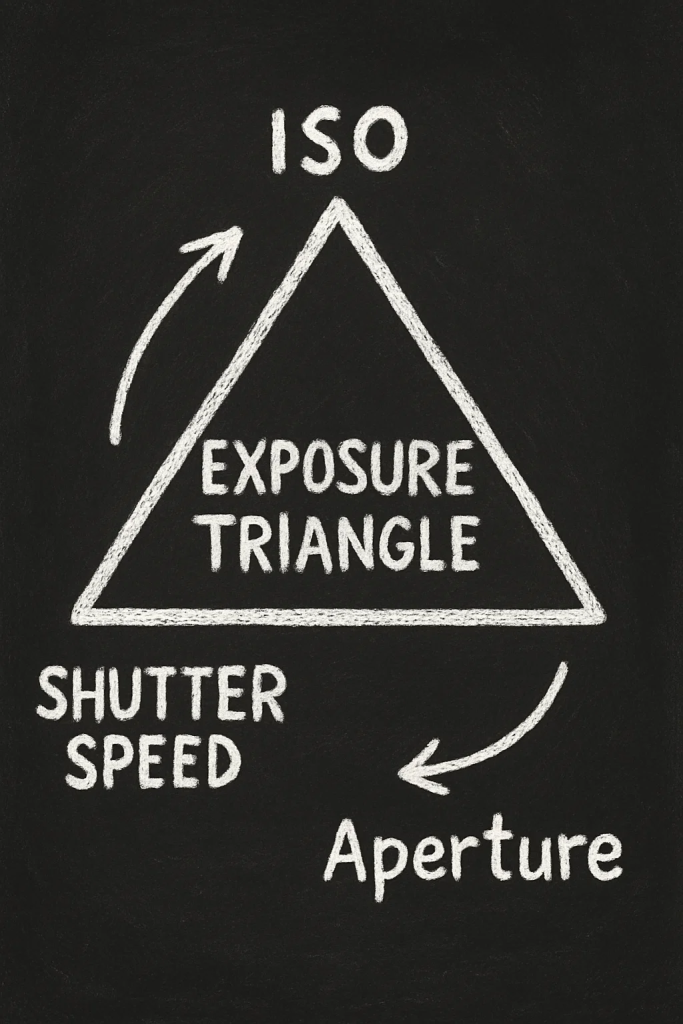
To fully grasp ISO in photography, you need to see it as part of the exposure triangle, working in tandem with aperture and shutter speed to produce a well-exposed image.
Exposure is the total amount of light that reaches your camera’s sensor: it’s a balancing act.
If you’re photographing a glowing mountain range at dawn, your exposure decisions determine whether that light feels soft and ethereal, or harsh and overblown.
Here’s where ISO’s role comes into play. While aperture and shutter speed physically control how much light hits the sensor, ISO determines how brightly that light is interpreted.
Think of it like turning up the volume on a radio station: it makes the signal louder, but can also introduce static.
Similarly, increasing ISO makes your sensor more responsive to light; but it can amplify unwanted digital noise, particularly in shadow areas or when heavy edits are applied later in post-processing.
So when should you reach for ISO? Use it as your final adjustment, not your first.
If you’ve already dialed in the aperture to get your ideal depth of field and set your shutter speed to avoid motion blur, and your image is still underexposed, then adjust ISO.
This is especially true in landscape photography, where we often rely on long exposures and sturdy tripods to avoid raising ISO unnecessarily.
But there are exceptions. In handheld shooting situations (think spontaneous hikes or backcountry travel where setting up a tripod isn’t realistic), ISO becomes your lifeline. It allows you to freeze motion or maintain sharpness without sacrificing image quality to camera shake.
Bottom line: ISO gives you flexibility, but it’s not a magic fix. Use it with intention, and always aim to maintain the cleanest file possible so your editing process remains smooth and your images stay detailed and noise-free.
ISO vs Aperture vs Exposure: Quick Comparison Table
| Feature | ISO | Aperture (ƒ-stop) | Shutter Speed |
|---|---|---|---|
| Primary Function | Controls sensor sensitivity to light | Controls light entering the lens | Controls duration light hits sensor |
| Creative Impact | Affects image noise | Affects depth of field | Affects motion blur or sharpness |
| Ideal for… | Low-light adjustments, handheld shooting | Wide scenes, foreground-to-background focus | Capturing or freezing movement |
| Common Landscape Setting | ISO 100–200 | ƒ/8 to ƒ/16 | 1–30 sec (with tripod + ND filter) |
| Watch Out For… | Too much noise at high ISO | Too little light at small apertures | Blurred images without tripod |
| When to Adjust | After setting aperture/shutter speed | First, to set creative intent | To capture motion or control light |
ISO vs Aperture: Finding Balance in Landscape Photography
When it comes to capturing stunning landscape images, understanding the interplay between ISO and aperture is critical for achieving the look and technical quality you want.
In simple terms, aperture controls how much light enters your lens, while ISO determines how sensitive your camera’s sensor is to that light. So when you’re faced with changing lighting conditions (like the golden hour fading into blue hour) you’ll often need to adjust one or the other.
Here’s the catch: in landscape photography, aperture isn’t just about brightness; it also controls depth of field, which affects how much of your scene appears sharp.
For tack-sharp foreground-to-background focus (a hallmark of professional-looking landscapes), you typically want to shoot between ƒ/8 and ƒ/16. This smaller aperture narrows the lens opening, which reduces light, but gives you crisp details throughout the image.
Now, if you’re sticking with a narrow aperture and the light is low (say, just after sunset or deep in a forest), you’ll need to compensate. You could use a longer shutter speed (with a tripod), or increase ISO. But this is where balance comes in: raising ISO too much introduces digital noise, especially in the shadow areas.
So how do you decide? Think of aperture as your creative priority; what depth of field do you want? Once that’s set, adjust ISO only as much as needed to preserve exposure, and avoid noise by keeping it as low as possible.
For most modern cameras, ISO 100–400 delivers clean results, even in low light. The goal is to preserve sharpness and image quality, not just proper exposure.
ISO Noise Comparisons
For those of you that enjoy the technical and data driven side of photography as much as the artistic side, a quick reference on how noise scales with ISO on different cameras is available. Check out the noise comparison charts on Photons to Photos. They’re a great resource to understand your camera’s performance.
Learn more about exposure, aperture, and the exposure triangle with these posts:
- Is it better to under or overexpose
- Exposure triangle for beginners
- Perfect Your aperture for Landscapes
- What is aperture and Depth of Field
- ISO in Photography
Conclusion
By mastering ISO in photography, you’re gaining critical control over image quality, motion, and light. Knowing which ISO to choose gives you creative freedom, whether you’re cranking it up for a starry sky or keeping it low for crystal-clear daytime shots.
Pair that ISO knowledge with smart choices for shutter and aperture, and you’re well on your way to confident, professional-level landscape photography.
📸Learn for free!
➡️ FREE Wallpapers and Guides
➡️ DISCOUNTS on future Tours & Tutorials
➡️ TIPS for improving Your photography
You can unsubscribe at anytime.
- ISO Meaning and Why it Matters to Your Landscape Photography
- What Does ISO Mean in Photography?
- What Is the Best ISO for Different Landscape Scenes?
- How Does ISO Affect a Photo?
- ISO vs Exposure: How ISO Affects the Whole Triangle
- ISO vs Aperture vs Exposure: Quick Comparison Table
- ISO vs Aperture: Finding Balance in Landscape Photography
- ISO Noise Comparisons
- Conclusion
- 📸Learn for free!
- Learn more about exposure, aperture, and the exposure triangle with these posts:
- 📸Learn for free!
Further Reading & Resources
- Digital Photography School. “The Best ISO for Landscape Photography”
- Photography Life. “What is ISO in Photography”