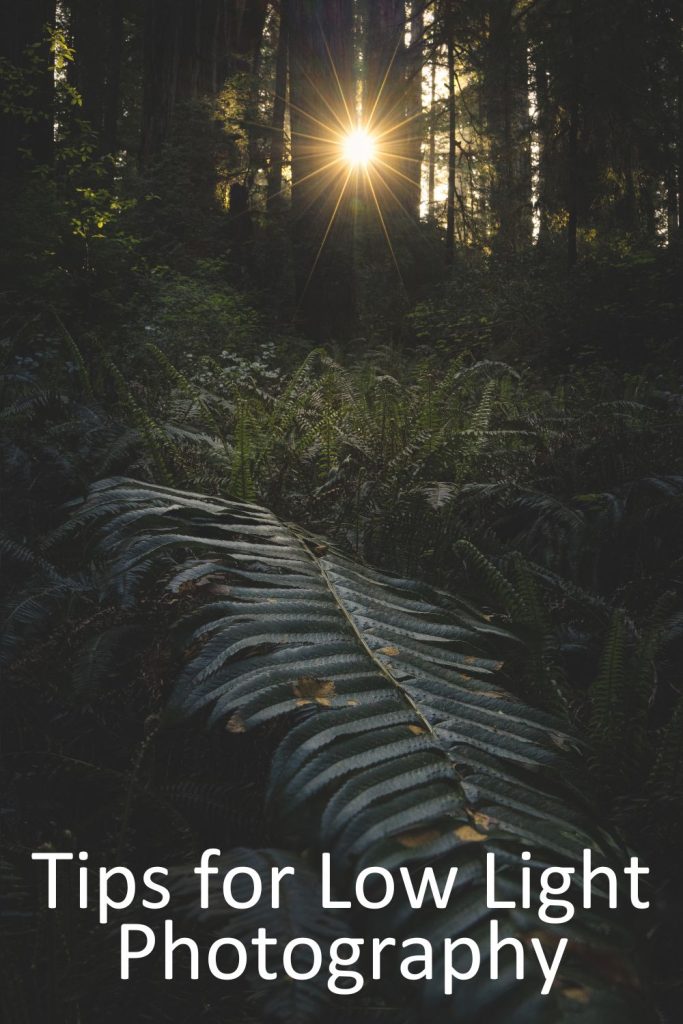
Low light photography opens up an entirely different world, one filled with mystery, depth, and raw emotion.
In landscape photography, we often speak about the power of light. It’s the foundation of every shot, shaping and illuminating the world before our lens.
But what if I told you that darkness, often seen as an obstacle, can be just as powerful?
In this post, you will learn how to photograph in low light, creating meaningful and memorable images.
I receive a small commission from links in this post, thank you for your support
Embracing Darkness in Landscape Photography
In photography, we often hear that “light is everything.” While that holds true, low light situations offer an equally important, yet often overlooked, opportunity to tap into the mysterious and shadowy aspects of nature.
Darkness isn’t something to fear or avoid; it’s a necessary counterpart to light. It’s in the balance between these two forces that the deepest beauty and meaning emerge. Low light photography, much like nature’s cycles of day and night, asks us to embrace both the visible and the unseen.
There’s something about shooting in low light, about shooting the unknown. It taps into the natural transitions from day to night and light to shadow.
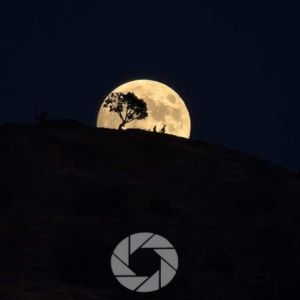
We can embrace the shift from light to dark in our photography. Whether you’re capturing the deep shadows of an ancient forest or the silhouette of a mountain at dusk, there’s a sense of awe and reverence in these low light moments.
As landscape photographers, we’re not just capturing a scene; we’re capturing a mood, a moment, a feeling. Low light photography gives us the chance to go beyond the obvious and explore the beauty that emerges when the light fades. It’s a practice that requires patience, but it’s also one that rewards you with images that are rich in depth, emotion, and narrative.
Light is the first of painters. There is no object so foul that intense light will not make it beautiful. ~ Edward Weston
Discover Your Next Journey – These Tours are designed for people who connect with light and landscape.
What is Low Light Photography
Low light photography refers to capturing images in environments with limited available light; like early morning, twilight, nighttime, or heavily overcast conditions.
Unlike brightly lit scenes, these conditions demand specific techniques, gear choices, and camera settings to get clear, detailed, and well-exposed images.
Base Camera Settings for Low Light Photography
These are your go-to settings to get started. From there, tweak based on your scene and gear.
Shooting in Manual (M) gives you full control over shutter speed, aperture, and ISO. This is essential for being successful in low light photography.
Aperture for low light base setting to start at are f/2.8 to f/5.6 – Use a wide aperture (lower f-number) to let in more light. For landscapes, if you need more depth of field, you might stop down to f/8, but this will require longer exposures or higher ISO and the use of a sturdy tripod.
Low light shutter speed should be 1–30 seconds, depending on how dark it is and whether you’re using a tripod. For handheld shots, don’t go slower than 1/your focal length (e.g. 1/50s for a 50mm lens), unless you’re using image stabilization.
ISO should be around 800–3200. Go higher if needed, but know that higher ISO can introduce more noise, depending on your camera. Newer cameras handle high ISO better, especially full-frame sensors. I like to expose to the left (ETTL) in camera to preserve deep rich color detail and give the scene a moody feel.
For white balance, start with Auto, or set 3200–4200K for a cooler, night-like feel. You can always adjust this in post.
Manual Focus or Single Point Autofocus. Autofocus can struggle in low light, so zoom in using Live View to fine-tune.
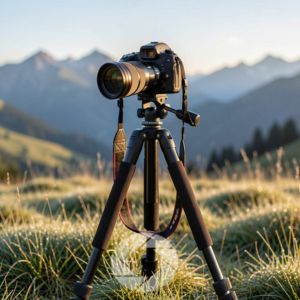
Essential Gear for Low Light Photography
Here are the things I bring with me as a basic kit, yours may differ, and I add or remove things depending on what is available to shoot.
- Tripod
- Remote Trigger
- Wide Angle (Rokinon 14mm)
- Zoom (Canon 24-105mm)
- Headlamp or Light Source
- Extra Batteries
Mastering Low Light Photography: Tips for Shooting in Low Light
Shoot in RAW for Flexibility
Shooting in RAW is essential when dealing with low light situations. Raw files contain much more data than JPEGs, giving you greater flexibility when editing.
This can be particularly helpful when working with shadows in photography, as you’ll have more control over recovering details from dark areas and adjusting exposure without degrading the image quality.
RAW files are your safety net in low light photography, letting you fine-tune your images in post-processing to bring out the best of both light and dark elements.
Increase ISO Without Fear
Modern cameras handle higher ISOs with impressive efficiency. Don’t be afraid to boost your ISO to maintain a faster shutter speed in low light environments. While it’s true that increasing ISO can introduce noise into the image, newer cameras are much better at minimizing this.
Plus, a little grain can add to the mood of the shot, emphasizing the ruggedness of a scene. Higher ISO allows you to shoot handheld in darker conditions without sacrificing too much image quality.
Bracket Exposures/Multiple Exposures
Bracketing exposures means taking several versions of the same scene at different exposure levels; typically one correctly exposed, one underexposed, and one overexposed. This technique can be a lifesaver in high-contrast situations, where the light creates bright highlights and deep shadows.
Your camera’s sensor might struggle to capture both ends of that range in a single shot, but bracketing can help preserve all those details.
There are a few situations where exposure bracketing is especially helpful:
- Golden hour with bright skies and shadowed forests: You might underexpose one shot to keep the sky rich and detailed, and overexpose another to brighten the forest floor
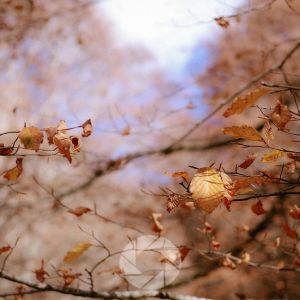
- Shooting into the sun or backlit leaves: Backlighting is gorgeous, but often causes blown-out highlights. Bracketing ensures you don’t lose texture in those bright areas
- Night or twilight scenes with artificial light sources: Streetlamps or light leaks can overpower a scene. Bracketing helps balance these intense light sources with the darker surroundings
Once you’re back home, blend the exposures using Lightroom’s HDR merge or dive into Photoshop for manual blending with layer masks. The goal isn’t always to create a hyper-real HDR image, instead, use the software to create your vision.
Scout Locations in Daylight
When you’re shooting in low light (whether it’s dawn, dusk, or twilight under the trees) familiarity becomes your best friend. Scouting your location during the day can save you time and frustration later when you’re working with limited light and visibility.
Here’s what you’re looking for when you scout in daylight:
- Compositional anchors like leading lines, tree clusters, or water reflections that you can’t easily spot in the dark
- Trip hazards or difficult terrain (roots, drop-offs, uneven ground) that could be dangerous in low visibility
- The position of the sun at golden hour or blue hour to plan your compositions in advance
If you’ve walked the trail and explored your potential compositions ahead of time, then when the light starts to fade or the stars begin to emerge, you’ll feel confident. You can focus on nailing the shot rather than fumbling with your settings or second-guessing your composition.
Use the Histogram
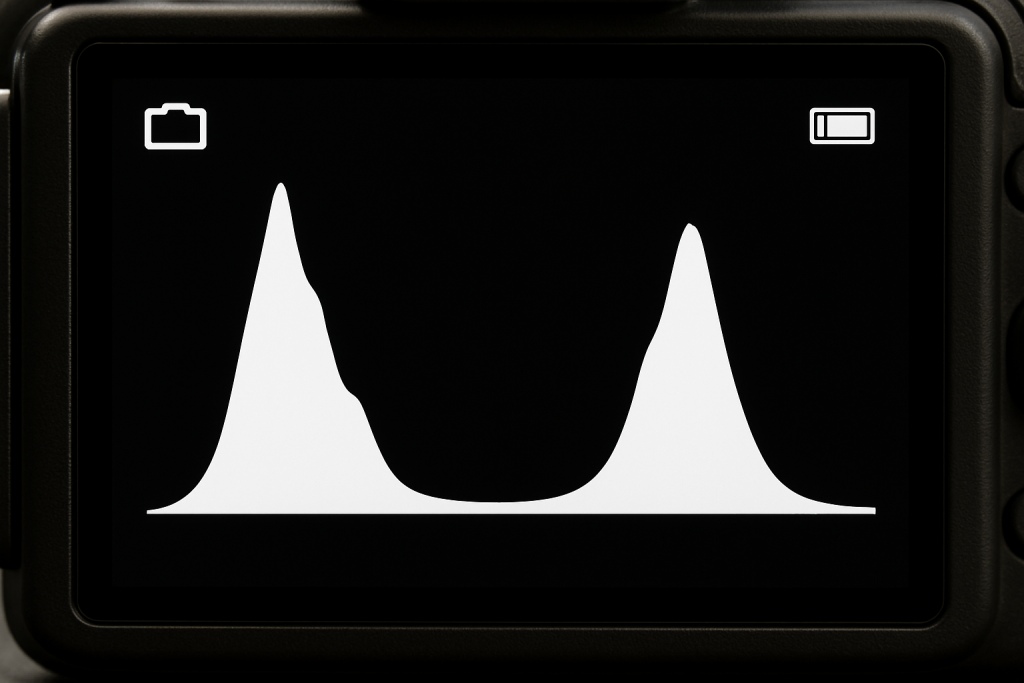
Don’t trust your LCD. The histogram gives you a better sense of exposure, especially in the dark. Check it after each shot to ensure that you aren’t blowing out any highlights or crushing the shadows.
You should try to get our histogram to look like this, with 2 peaks and not touching the sides of the histogram. When the peaks touch the edges this indicates that you have blown out highlights and crushed shadows.
Creative Ways to Capture Low Light Photography
Low light photography challenges us to think outside the box, requiring creativity to make the most of the limited light available.
Whether you’re shooting in the golden glow of twilight, under the moonlight, or in the dim ambiance of a forest canopy, low light offers endless opportunities for capturing unique and captivating images.
Here are some creative techniques you can use to enhance your low light photography.
Long Exposure for Movement and Drama
One of the most exciting techniques in low light photography is long exposure. When you slow down your shutter speed, you allow your camera to capture movement in a way that creates dynamic, fluid images.
Long exposure allows us to capture the passage of time in a single frame adding the dimension and context of time to our images.
This is especially useful when photographing water, clouds, or even stars. The extended exposure time smooths out water, giving it a dreamy, ethereal look, or it turns clouds into soft streaks across the sky.
The movement of the clouds, the flowing water, or even the rotation of the stars can evoke a sense of continuity and connection with your viewer.
A tripod is essential for this type of photography, as the longer exposure times can lead to camera shake. Use a remote shutter release or your camera’s timer to minimize vibrations.
This technique is particularly powerful at twilight or during the blue hour, when there’s just enough ambient light to work with, but the fading light adds a mystical mood to the scene.
Use Artificial Light to Highlight Key Elements
In low light situations, you can use artificial light (such as a flashlight, lantern, or even a phone light) to highlight specific elements in your composition.
Known as “light painting,” this technique involves moving the light source over your subject during a long exposure, allowing you to control which parts of the scene are illuminated. This can be particularly effective when shooting in pitch darkness, where natural light is limited.
For example, you might use a flashlight to illuminate a tree, a rock, or a path in a forest, while leaving the rest of the scene in shadow. This creates a focal point and adds depth to your image. It can also help evoke a sense of mystery and magic, particularly when photographing in nature at night.
Light painting is a perfect reflection of the balance between light and dark; a core principle in pagan belief systems. It allows you to play with the duality of darkness and illumination, choosing what to reveal and what to leave in shadow.
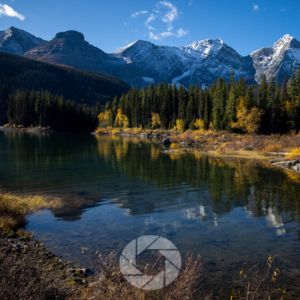
Capture Reflections in Low Light
Reflections offer another creative avenue for low light photography, particularly around bodies of water. At dawn, dusk, or even night, the reflective surface of a lake or pond can mirror the fading light, amplifying the colors and adding symmetry to your composition.
By placing a focal point like a tree, mountain, or moon in the center of your composition, you can use the reflection to double the impact of your image.
The key here is timing and patience. The stillness of water is best captured when there’s little to no wind, so waiting for the perfect moment is critical. The soft, muted light at these times of day enhances the mood of the scene, creating a tranquil and meditative quality.
The symbolism of water as a reflective, liminal space; one that exists between the physical and spiritual worlds is common in many theologies. Capturing reflections in low light not only makes for striking photographs but also evokes the mystical nature of water as a portal to the unseen.
Embrace the Power of Negative Space
In low light situations, it can be tempting to try to illuminate everything in your frame. But one of the most powerful compositional tools at your disposal is negative space; the areas of the frame that remain dark or empty.
By allowing large portions of your image to fall into shadow, you can create a stark contrast between the dark and light elements of your photo, drawing attention to the illuminated areas.
Negative space can help evoke feelings of solitude, introspection, and mystery, making your low light images feel more profound and emotive.
This concept is closely tied to pagan beliefs around balance, particularly the idea that darkness is not a void to be filled but a space of potential and possibility.
By embracing the shadows, you create room for the imagination, allowing your viewer to engage more deeply with the image.
Learn more about exposure, aperture, and the exposure triangle with these posts:
- Is it better to under or overexpose
- Exposure triangle for beginners
- Perfect Your aperture for Landscapes
- What is aperture and Depth of Field
- ISO in Photography
Editing Photos to Enhance or Emulate Low Light Photography Conditions in Lightroom
Whether you’re editing actual low light shots or want to create a darker, moodier vibe from a daytime photo, Lightroom gives you powerful tools to shape the final look.
Adjust Exposure Thoughtfully
Lower exposure slightly to begin creating that nighttime feel. It helps to reduce Highlights to tone down bright areas (like skies or reflections).
You can also deepen shadows for added mystery; how much detail you wish to leave in your shadows is an artistic choice you make for your goals with the image. Personally, I am trying to accent the dynamic range, to enhance the light by using shadows, so I could care less if my shadows lack detail.
Increase Contrast….But Not Too Much
Adding moderate contrast helps separate the bright golden foliage from the darker tree trunks or shadowy forest floor. It brings definition and drama to the scene, giving your photo more structure and visual interest. But go easy because too much contrast can cause banding in skies or make your shadows lose detail.
Try this in Lightroom:
- In the Basic panel, raise the Contrast slider slightly (usually no more than +20 to +30)
- Then fine-tune with the Tone Curve for a more precise adjustment; a gentle S-curve can deepen shadows and lift highlights just enough to make the scene pop without becoming harsh
In a photo of golden aspens under a cloudy sky, a gentle boost in contrast can emphasize the glow of the leaves without overpowering the subtlety of the overcast light.
Clarity and Texture: Choose Your Mood
Clarity and Texture are often confused, but they serve different purposes and both are incredibly powerful tools in fall photography.
Texture enhances fine details like bark, moss, leaves, or rocky ground without increasing contrast in the midtones. It’s a subtle way to bring crispness to the tactile elements of your image
Clarity boosts midtone contrast, making your photo look more defined and punchy. It’s great for making a scene feel sharper and more dynamic but too much can make foliage look overly crunchy or artificial
You don’t always have to add clarity or texture; in fact, removing Clarity is one of my favorite tricks for creating a dreamy, soft atmosphere, especially in foggy forests or misty meadows. It flattens out the midtones just enough to mimic that ethereal glow of early morning or post-rain light.
Try this in Lightroom:
- Texture: +10 to +25 for crisp leaves or tree bark
- Clarity: +10 to +20 for boldness, or –10 to –30 to soften and create a fog-kissed look
In a quiet forest scene with morning fog, lowering Clarity to around –20 while gently boosting Dehaze can create that magical, storybook atmosphere, like you’re walking through a scene from a folktale. This works best when you are working with some fog or mist that is already present in the scene.
Use the Tone Curve for Drama with Low Light Photography
Once you’ve dialed in your basic exposure and made subtle contrast adjustments in the Basic Panel, it’s time to add finesse and visual storytelling with the Tone Curve. This tool gives you deeper control over how light and shadow behave in your image, and it’s where the real mood-making happens.
Start by Lowering the Black Point
Pulling down the bottom left point of the Tone Curve just a hair deepens your darkest blacks, adding richness and drama to shadowed areas like tree trunks, mountain ridges, or forest floors.
This gives your image more depth and definition, especially when working with those cozy, low-contrast scenes you often find in overcast autumn light.
In a woodland scene with deep shadows under golden trees, lowering the black point helps anchor the image and keeps it from looking washed out.
Lift the Shadows for a Matte Look
Next, raise the shadow point (just up from the bottom left) slightly to create a matte finish, a gentle, filmic look that softens the transition between blacks and midtones. This is perfect for adding a vintage, dreamy atmosphere without sacrificing detail.
If you’re shooting a foggy trail or a backlit glade, lifting the shadows helps maintain that soft glow while giving the image a painterly touch.
Add an “S” Curve for Controlled Contrast
- Lift the highlights (top right of the curve) just a touch to brighten the lightest areas; think sky, clouds, or sunlit leaves
- Lower the darks (bottom left quadrant) just a bit more to give shadows weight
- Keep the midtones (center of the curve) relatively stable to maintain natural-looking skin tones or leaf color
This gives your image a controlled, punchy contrast that adds pop without blowing out highlights or crushing shadows.
In a wide scene with golden leaves and dark evergreens, an S-curve helps emphasize the warm color separation while keeping everything feeling rich and textured.
Quick Tip for Beginners
If the full RGB Tone Curve feels intimidating, try using the “Region Curve” or work in the “Point Curve” view with the “Medium Contrast” preset as a starting point; then tweak from there.
White Balance, Color Grading, and Temperature
Cool Down the Temperature for Mood
Start by adjusting the White Balance (WB) slider in Lightroom. Sliding toward the cooler (blue) side immediately sets a nighttime or twilight mood, perfect for early morning woods, moonlit shots, or starry skies.
In a forest scene taken at blue hour, reducing the temperature helps reinforce that moody, quiet, dusky atmosphere like you’re walking into a dream.
You can also warm things up selectively using local adjustments (like a radial filter around a campfire or golden leaves), but globally cooling the image helps unify the look.
Color Grading: Add Emotion to Low Light Photography with Split Toning
Lightroom’s Color Grading panel (previously called Split Toning) lets you shift the mood even further by applying different color tones to highlights, midtones, and shadows. Here’s a great formula for low-light or atmospheric photography:
- Shadows: Add cool blues or blue-green tones as this adds depth and mystery
- Highlights: Introduce warm oranges or peach tones; simulating lantern light, city glow, or golden hour warmth
Then adjust the blending slider to control how softly the colors transition.
Imagine a photo where streetlamps cast a soft amber glow against a shadowy blue twilight; this combo brings that feeling to life.
Saturation and Vibrance: Polish and Focus
After setting the mood with temperature and color grading:
- Vibrance: Boosts muted colors while protecting skin tones and over-saturated areas which is perfect when you want your golden leaves to stand out subtly
- Saturation: Use with caution. Lowering it slightly can eliminate distracting colors in shadows or skies, helping your subject stand out
In a cityscape with colorful signage, toning down saturation can remove harsh reds or greens while keeping the amber lights glowing warmly.
Masking for Selective Control
Selective adjustments can guide the viewer’s eye and enhance atmosphere without making the whole photo look over-edited.
Radial Filter or Brush Tool for Natural Vignettes
- Create a radial mask around the subject or light source
- Lower the Exposure, Highlights, or Clarity on the outer edges to darken them subtly which simluates a natural vignette and drawing attention inward
If your subject is lit by a lantern or shaft of light, darkening the surroundings focuses attention while adding intimacy and mood.
Add a Glow Over Light Sources
- Use the Brush Tool with Clarity set to -30 to -50, and Exposure +0.3 to +0.6
- Lightly brush over lanterns, sun flares, or softly lit windows
- Feather the brush generously for a soft blend
This technique simulates the atmospheric glow of light in mist, fog, or dust which is ideal for woodland or rural scenes.
Brush over a window in a cabin scene to mimic warm light spilling into the cool forest air.
Noise Reduction and Sharpening
Low light often means high ISO and high ISO means noise. Lightroom’s Detail Panel gives you powerful tools to manage this.
Luminance Noise Reduction
- Start with Luminance between 15–30 (depending on how much noise you have)
- Use Detail and Contrast sliders to fine-tune and avoid over-smoothing
- Avoid maxing it out because your image may lose texture and look plasticky
A Milky Way shot at ISO 3200 might need Luminance 25, Detail 70 to reduce grain without making stars look soft.
Sharpening Without Enhancing Noise
- Set Amount to 30–50
- Use the Masking slider (hold Alt/Option while dragging) to sharpen only edges as this keeps noise in smooth areas (like sky or fog) from getting sharpened
In an autumn forest scene with high ISO, use masking so only leaf edges and tree bark get sharpened not the smooth fog in the background.
Don’t Forget Lens Corrections
Always enable “Remove Chromatic Aberration” and “Enable Profile Corrections” under Lens Corrections before editing your photo. To ensure your adjustments in post are based on an accurate rendering of your lens’s actual output do this:
- Straighten perspective
- Remove unwanted vignetting or distortion
- And keep your colors and edges clean
Conclusion
Low light photography is as much about embracing the darkness as it is about capturing the light. By using creative techniques like long exposure, star trails, light painting, reflections, and negative space, you can create images that feel otherworldly, profound, and connected to the deeper cycles of nature. Mastering low light photography encourages us to find beauty and meaning in the shadows.
By incorporating these techniques into your practice, you’ll not only improve your low light photography but also develop a deeper appreciation for the balance between light and darkness.
- Embracing Darkness in Landscape Photography
- What is Low Light Photography
- Base Camera Settings for Low Light Photography
- Essential Gear for Low Light Photography
- Mastering Low Light Photography: Tips for Shooting in Low Light
- Creative Ways to Capture Low Light Photography
- Editing Photos to Enhance or Emulate Low Light Photography Conditions in Lightroom
- White Balance, Color Grading, and Temperature
- Masking for Selective Control
- Noise Reduction and Sharpening
- Conclusion
- More Learning about Low Light Photography
- Learn more about exposure, aperture, and the exposure triangle with these posts:
More Learning about Low Light Photography
Portfolio Quality Images in Extreme Low Light | Lightroom Tutorial
This YouTube tutorial demonstrates how to enhance photos taken in extremely low-light situations. It focuses on techniques to improve exposure, reduce noise, and bring out details without compromising image quality.
How to Edit Low-Light Photos in Lightroom: Step-By-Step Guide
This article from Digital Photography School provides a detailed, step-by-step guide on editing low-light photos in Lightroom. It covers evaluating your photo, checking for clipped highlights and shadows, adjusting exposure, increasing contrast, and more.
EDITING A LOWLIGHT PHOTO | Lightroom Tutorial
In this video tutorial, the creator walks through the process of editing a low-light photo in Lightroom, focusing on nighttime cityscapes and portraits. It offers practical tips on adjusting exposure, contrast, and color balance to achieve a compelling low-light aesthetic.
How to Add a Dark Aesthetic to Your Photos | Adobe Lightroom
This tutorial explores how to create a dark, moody aesthetic in your photos using Lightroom. It covers the use of presets, color grading, and other techniques to achieve a dramatic look.
How To Edit Your Night Street Photography Images in Lightroom
This blog post by Joe Redski offers insights into editing night street photography images in Lightroom. It emphasizes the importance of subtle adjustments and provides tips on using exposure, contrast, and color grading to enhance your photos.
Moody Pictures with Dark Aesthetic: 8 Workable Tips and Lightroom Tutorial
This article provides eight practical tips for achieving a moody, dark aesthetic in your photos using Lightroom. It discusses camera settings, natural lighting, contrast, and more to help you create compelling images.