Winter brings a special magic to photography that no other season quite matches.
Snow-covered trees, glistening ice, and misty, foggy mornings create scenes that are both peaceful and exhilarating.
However, achieving the best winter photos requires understanding a few unique challenges that come with the cold.
Here, I’ll share some practical winter photography tips and techniques to make sure you’re prepared to capture winter’s beauty in all its glory.
I receive a small commission from links in this post, thank you for your support
Winter Photography Tips for Beginners
Winter Photography Settings: Camera Settings for the Best Winter Photos
Winter’s unique lighting can add both beauty and complexity to your shots, so having a solid understanding of settings for various conditions will help you master the look you want.
Low Light Mornings or Evenings: Early mornings and late afternoons, when light is scarce, benefit from a wider aperture (like f/2.8 or f/4) to let in more light, especially if you’re focusing on a specific subject within the landscape.
Pair this with a slightly higher ISO (between 400-800) but be mindful of noise. Use a slower shutter speed around 1/60s to 1/125s if you’re on a tripod, which is a good idea in these low-light conditions to avoid blur.
Bright Snowy Landscapes: Snow can be a challenge as it reflects so much light, often tricking cameras into underexposing. To counter this, start by slightly overexposing by +1 to +2 EV.
Set your aperture to around f/8 to f/11 to keep depth and detail in the landscape, and an ISO as low as 100-200 to minimize noise.
For a perfectly balanced exposure, aim for a faster shutter speed around 1/250s or faster if there’s direct sunlight.
Golden Hour Snow Glow: During golden hour, snow takes on a warm, almost surreal quality. Experiment with an aperture of f/5.6 to f/8 to capture more depth and detail across the scene.
With lower light levels, use an ISO of around 200-400 and a slightly slower shutter speed of 1/60s to 1/125s.
Don’t hesitate to play with exposure compensation and/or white balance to get the richness of the scene; adding a +1 exposure can help bring out the warmth.
Capturing Movement in Winter Photography: How to freeze falling snowflakes requires using a faster shutter speed, like 1/250 sec or higher.
Use a wide aperture (around f/2.8 to f/4) for the bokeh effect if you’re after that blurred, dreamy look with soft snowflakes in the foreground. Here, a higher ISO like 400-800 may be needed depending on the time of day and available light.
If you want to capture slight motion blur for a softer look for the falling snow, experiment with speeds between 1/10 sec and 1/125 sec.
Use a fast shutter speed starting at 1/500 sec or faster, to capture moving subjects sharply. This is useful for shooting subjects like birds in flight, skiers, or snowboarders.
Adding Motion Blur: For falling snow or misty weather, try a slower shutter speed, such as 1/125 sec, to introduce a hint of motion. This creates a dreamy, soft effect in your winter photos.
Remember, winter light changes fast, so these starting points are meant to guide you.
Regularly adjust based on the exact conditions and, if possible, check your histogram to ensure you’re capturing the full range without losing details in the highlights or shadows.
My Free Winter Landscape Photography Guide walks you through everything you need to capture not just images, but the true spirit of the season.
Free Guide: Your Best Winter Photos Yet!
Winter Photo Gear to Use
- Sturdy Tripod from FLM
- Zoom (Canon 24-105mm)
- Long Range Zoom (100-500mm)
- Wide Angle (Rokinon 14mm)
- Remote Trigger (or use in Camera timer)
- Lens Cloths
- ND Filters
- Polarizer
Photographing Winter Landscapes: Achieving the Best Winter Photo Exposure
One of the trickiest aspects of winter photography is handling exposure. Winter landscapes, particularly snowy ones, present unique challenges in terms of exposure.
Snow’s reflective properties often make photos appear underexposed. To achieve the best winter photo exposure, follow these guidelines.
Overcome Underexposure
Exposure Compensation: When shooting in automatic modes like Aperture Priority (Av) or Shutter Priority (Tv), start with an exposure compensation of +1 to counteract the darkening effect snow can have on your images. Adjust as needed until you achieve the desired brightness.
Checking Your Histogram
If you’re shooting in manual mode, rely on the histogram to ensure your highlights aren’t blown out. Snow can cause the camera’s meter to underexpose, and using the histogram is a great way to verify that you’re not losing any detail.
Aim to avoid any peaks on the right side of the histogram, which indicates blown-out highlights. If you see peaks, reduce your exposure until the histogram shows a more balanced distribution and always take a few test shots and check your screen to verify you’re getting the exposure you want.
RAW Format and White Balance
Shooting in RAW format gives you more control in post-processing, especially with white balance. This format captures the maximum amount of data, giving you greater flexibility in post-processing, especially for adjusting exposure and white balance.
Snow often appears overly blue in photos, so adjust the temperature in post-production to get a more accurate white color and that is easiest when you’ve shot in RAW.
Manual with ISO Auto
For those comfortable with manual settings, consider using Manual mode with Auto ISO. This combination allows you to maintain control over your aperture and shutter speed while letting the camera adjust ISO as needed to maintain proper exposure

Ideal Winter Photography Locations
The variety of winter landscapes offers endless opportunities to explore different styles and emotions in your photography. Each of these locations provides its own unique take on winter’s aesthetic, from the calm and quiet of frozen lakes to the wild expanse of a mountain ridge.
Spend some time in each setting, observing how the winter light transforms familiar landscapes into something both raw and majestic.
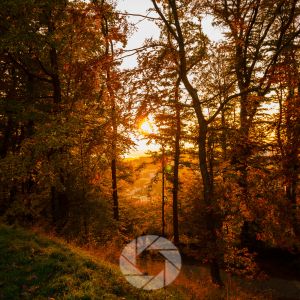
Forests with Snow-Covered Pines: Snow-laden forests provide a wonderful mix of contrast and texture, ideal for creating moody, almost magical images. Aim for areas with old-growth trees and winding paths to create leading lines and depth.
Snow-covered branches against darker backgrounds create a pleasing, natural contrast that’s ideal for both close-ups and sweeping shots.
Mountains at Dawn or Dusk: Winter mountains are dramatic and enchanting, especially as the sun rises or sets, casting long shadows and golden light over snowy peaks. Places like the Rockies or the Sierra Nevada range offer towering vistas that catch those winter pastels beautifully.
Capture the play of light and shadow, and consider using a wide-angle lens to emphasize the vastness of the landscape.
Frozen Lakes and Rivers: Lakes and rivers offer reflections that can double the beauty of snow-laden trees or distant mountains. When these bodies of water partially freeze, you can capture unique textures and patterns.
Look for thin layers of ice, or better yet, frozen bubbles in lakes like Abraham Lake in Alberta for added interest.
Coastal Winter Scenes: Coastal regions in winter can be particularly striking, especially in areas where snow meets sand or where fog settles over still waters. The dramatic skies of winter and occasional icy details on rocks and piers bring a different, quieter side of the season into focus.
Snow-Covered Villages or Towns: Picturesque villages or towns blanketed in snow provide charming scenes that combine the beauty of architecture with natural elements.
Look for small towns nestled in valleys or along lakeshores; places like Banff, Colorado’s Crested Butte, or New England’s charming hamlets are photogenic and accessible even during winter.
Learn More About Winter Photography in These Posts
- Winter Solstice Photography
- How to Photograph Frost, Snow, and Ice Details
- Winter Landscape Composition Tips
- Understanding Winter Light in Landscape Photography
- How to Photograph Winter Landscapes Without Gray Snow
- Best Camera Setting for Winter Photography
- Cold Weather Photography Gear Checklist
Winter Photography Ideas: Photographing Winter Landscapes
If you’re looking for ideas for nature photography, winter offers endless opportunities. From vast snow-covered landscapes to intricate ice formations, the possibilities are both grand and intimate. Here are some winter photography tips to consider as you explore the beauty of the season.
Tips for Cold Weather Photography
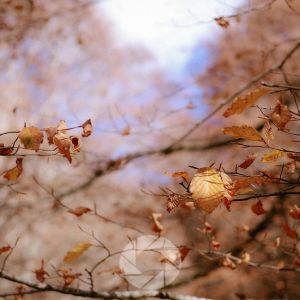
Frosted Details and Close-Ups
Macro shots of frosted leaves, icicles, and snowflakes reveal delicate details that aren’t visible in other seasons. Look for textures and patterns in the ice or close-ups of pine needles dusted with snow. These small, intimate details can make for some truly beautiful winter photography.
Winter Landscape Photography
When snow blankets a familiar scene, it transforms the landscape into something new and refreshing. Mountains, fields, or forests take on a quiet, ethereal quality. Use a wide-angle lens to capture the vastness of the scene, but don’t forget to play with perspective such as posing a person or object in the foreground can help convey the scale of the winter landscape.
Photographing Wildlife in Winter
Animals that stay active through winter, like deer or certain birds, make for captivating subjects. Photographing wildlife in the snow requires patience and a long lens if possible, as you want to keep a respectful distance. Winter can create beautiful contrasts between the white snow and the dark fur or feathers of animals, adding a dramatic touch to your nature photos in winter.
Morant’s Curve ~ Without the Train
The iconic viewpoint for the train in Banff. No train to speak off when we were there, however, I managed to create this beautiful early morning light scene of the Bow River winding through the snowy scene.

Above: The golden hand of winter over the Bow River near Banff.
Composing Your Winter Landscape Photography
Winter landscapes offer unique compositional opportunities. Snow simplifies the scenery, often reducing the scene to basic shapes and forms. Here are a ton of winter photography tips to enhance your beautiful winter photography.
How to Make Winter Photos Look Better: Best Winter Photo Ideas
Look for Leading Lines
Snow-covered fences, trails, or rivers naturally lead the viewer’s eye through your photo. These elements add depth and guide the viewer’s attention to the focal point, enhancing the immersive experience of the winter landscape.
Capture Blue Hour Magic
Shooting just before sunrise or after sunset, during blue hour, can enhance the icy blues and soft pastels that make winter so magical. Snow takes on a quiet, luminous quality in low light, and the cool tones emphasize the winter atmosphere.
Utilize Contrast for Depth
Winter scenes can sometimes appear flat, especially when the sky is overcast. Look for natural contrast points like dark tree trunks, shadows on the snow, or rocks peeking through the snow to give your images a more dynamic feel.
Emphasize Scale and Space
Including a small figure against a vast landscape helps convey the scale of the environment, which is especially impactful in winter photography. This contrast between human and landscape highlights the quiet grandeur of winter scenes.
Including elements like trees, rocks, or even a person in the foreground can add depth and provide a sense of scale to your images. This contrast between the foreground and the sweeping snow-covered background can create a powerful visual impact.
Find Interesting Light
Winter light is softer than other times of the year, which creates moody, atmospheric images. Early morning or late afternoon light works beautifully with snow, adding depth and warmth to an otherwise cool-toned scene. Check out my post on how Bad Weather makes for Great Photography to dive into this topic.


Stormy skies and interesting light add context and a dynamic feel to these scenes in Banff, above.
Experiment with Long Exposures
Long exposures work beautifully with winter photography, creating a serene and soft appearance with moving clouds or running water. For this technique, a tripod is essential, and using an ND filter can help balance out bright light if you’re shooting during the day.
Smoothing Snowy Water
Long exposures (5-30 seconds) can turn flowing water into a smooth, glass-like surface, adding a serene quality to your images. This technique is also perfect for capturing the motion of clouds or the trails of stars in the night sky. Just remember to bring a tripod, as these shutter speeds are too slow for handheld photography.
Neutral Density Filters
During daylight, use neutral density filters to achieve longer exposure times without overexposing your image. This is especially useful when shooting snowy landscapes in bright conditions.
Frost and Ice Macro Shots
Macro photography captures the fine details of frost, ice, and snowflakes up close. Look for interesting textures and shapes on icy surfaces and use a macro lens or a dedicated macro mode for these close-ups.
Winter Photography Gallery
Here is a small sample of some of my images in my Winter Canvases Gallery please head over to take a look.
Preparing Your Gear for Cold Weather Photography
In winter photography, the most important starting point is making sure your gear can handle the cold. Winter conditions can be tough on both you and your camera equipment, so taking extra precautions can make a big difference.
Winter Photography Tips to Protect Your Camera
Winter conditions are demanding, not just for you but also for your equipment. Keeping your camera warm, dry, and functional is crucial.
Wet Snow
Snow may seem harmless, but it can wreak havoc on your gear. A lens hood is essential to prevent snowflakes from accumulating on the glass, and a clear plastic bag can serve as an inexpensive yet effective weather-proofing solution.
Simply wrap the bag around your camera and secure it with a rubber band around the lens. This will shield your camera from moisture while still allowing you to shoot.
Condensation
Transitioning between cold and warm environments can cause your lens to fog up. Always carry a microfiber cloth to wipe away condensation. It’s a simple tool, but it can save you from missing the perfect shot.
Spare Batteries
Cold temperatures can quickly drain your camera battery, so bring a few spares and keep them in a warm pocket close to your body. My trick is to put a hand warmer in the pocket closest to my body and store the spare batteries with the hand warmer. You’ll thank yourself when your main battery unexpectedly dies mid-shoot.
Pack Essentials for Nature Photos in Winter
I recommend a few piece of gear that everyone should carry with them during a winter photography outing; microfiber cloth, lens hood, extra layers, warming gear.
A microfiber cloth is a must-have. Snow can easily land on your lens, and fogging is a common issue when moving between warm and cold environments. Keep this cloth handy to wipe your lens and viewfinder.
A lens hood can also help protect against snow and reduce the risk of lens flare from bright snow reflections.
Cold weather photography requires more than just warm gloves. Choose gloves that are water and wind proof that allow dexterity so you can adjust settings without exposing your hands to the cold. Water and wind proof gear are your best allies against the cold.
~There’s no such thing as bad weather, only bad clothing. ~
Dressing in layers and packing hand warmers can make those long hours in the cold much more comfortable and keep you focused on getting that perfect shot.
Hand warmers are especially helpful; tuck them into your gloves or pockets to keep your hands warm and nimble for those fine camera adjustments. A warm hat, thick socks, and even heated insoles can help you focus on capturing winter’s beauty instead of battling the cold.
Winter Photography Tips & Selecting the Right Lens
Wide Angle Lenses are perfect for capturing the vastness of snow-covered landscapes. They emphasize the scale and can make your viewer feel immersed in the scene.
Telephoto Lenses can help you focus on specific details, like snow-capped trees or distant mountain peaks. The compression effect of telephoto lenses also adds a dramatic flair to your images.
A telephoto lens allows you to capture wildlife or small, isolated details within a larger landscape. Try using a longer focal length to capture distant peaks, animals, or close-up patterns in the snow.
Making the Most of Lighting in Winter Photos
Winter light is softer than other times of the year, often with a cool, diffused quality that’s perfect for creating moody, atmospheric images. Remember, winter light changes fast, so these starting points are meant to guide you.
Regularly adjust you settings based on the exact conditions and, if possible, check your histogram to see if you’re capturing the full range without losing details in the highlights or shadows.
Remember that shooting in natural conditions is an exercise in compromise; sometimes you will need to lose the detail in your shadows or highlights in order to capture what you envisioned in the scene.
Golden Hour in Winter
During golden hour, snow takes on a warm, almost surreal quality. Experiment with an aperture of f/5.6 to f/8 to capture more depth and detail across the scene. With lower light levels, use an ISO of around 200-400 and a slightly slower shutter speed of 1/60s to 1/125s.
Don’t hesitate to play with exposure compensation to get the richness of the scene such as adding a +1 exposure can help bring out the warmth.
Warm Light and Deep Textures
The golden hour light creates a beautiful contrast against the cool tones of snow, adding depth and dimension to your images. Arrive early to find the perfect spot and be ready to shoot as the light changes.
Plan your shoots during these times for a stunning color palette and longer shadows that add depth to the scene.
Overcast Days
Don’t let gray skies discourage you. Overcast conditions create soft, even light across the landscape, which is ideal for winter photography as it reduces harsh shadows and emphasizes textures.
Patience Pays Off
Returning to the scene can be essential. Don’t be afraid to revisit a location as the day progresses or after additional snowfall. The evolving light and changing conditions can offer new perspectives and unexpected beauty.
Winter Photography Essentials: Gear Tips for Success
Winter photography requires a few specific pieces of gear to make sure you’re prepared for the cold and ready to capture those stunning shots.
- Tripod: Essential for long exposures or shooting in low light.
- Polarizing Filter: This can help manage reflections and enhance contrast in bright snow scenes.
- Hand Warmers: Keep these in your pocket or attach them to your camera to prevent battery drain.
Winter Photography Tips: Exploring Creative Possibilities
Winter photography offers opportunities to push your creative boundaries. Here are some techniques to try.
Black and White Photography
Black and white photography allows you to focus on texture and contrast, without color interrupting the scene. This is because snow naturally strips scenes of color, making winter an ideal time to experiment with black and white photography.
This approach emphasizes texture, composition, shapes, contrast, and the play of light and shadow.
Panoramas
Winter landscapes, especially mountain ranges or forests, make stunning panoramas. Shoot multiple images side by side and stitch them together in post-processing for a wide, immersive view.
Stitching together these multiple images will create a sweeping view that captures the full grandeur of the scene.
Conclusion: Photography Ideas for Winter to Inspire Your Next Shoot
Winter is a season that calls for patience, adaptability, and a love for the quiet beauty of nature. Whether you’re capturing the delicate details of a frost-covered leaf, the vastness of a snow-blanketed mountain range, or the intricate movements of wildlife, winter offers a unique, ephemeral canvas for photographers.
Remember, the best winter photos don’t just happen; they’re created by photographers who use the winter photography tips above ,embrace the cold, appreciate the beauty, and see the potential in every snowfall. So dress warmly, prepare your gear, and let winter inspire your photography in new and exciting ways.
FAQs
For snowy landscapes, it’s best to start with a low ISO (100-200), a medium aperture (f/8-f/11), and overexpose by +1 to +2 EV to prevent underexposure from the reflective snow. Adjust shutter speed based on your light conditions.
Golden hour is beautiful in winter, casting soft light that enhances snowy landscapes. Early mornings are often clearer, while late afternoon light adds warmth to cool scenes.
A wide-angle lens (16-35mm) is great for capturing vast winter scenes, while a telephoto (70-200mm) can isolate details like snow-laden branches or distant mountain peaks. Consider a prime lens (like 50mm) for crisp, focused shots in low-light settings.
Utilize Contrast for Depth: Winter scenes can sometimes appear flat, especially when the sky is overcast. Look for natural contrast points like dark tree trunks, shadows on the snow, or rocks peeking through the snow to give your images a more dynamic feel.
- Winter Photography Tips for Beginners
- Winter Photography Settings: Camera Settings for the Best Winter Photos
- Winter Photo Gear to Use
- Photographing Winter Landscapes: Achieving the Best Winter Photo Exposure
- Ideal Winter Photography Locations
- Learn More About Winter Photography in These Posts
- Winter Photography Ideas: Photographing Winter Landscapes
- Tips for Cold Weather Photography
- Morant's Curve ~ Without the Train
- Composing Your Winter Landscape Photography
- How to Make Winter Photos Look Better: Best Winter Photo Ideas
- Winter Photography Gallery
- Preparing Your Gear for Cold Weather Photography
- Pack Essentials for Nature Photos in Winter
- Winter Photography Tips & Selecting the Right Lens
- Making the Most of Lighting in Winter Photos
- Winter Photography Essentials: Gear Tips for Success
- Winter Photography Tips: Exploring Creative Possibilities
- Conclusion: Photography Ideas for Winter to Inspire Your Next Shoot
- FAQs